Your cart is currently empty!
Tag: party foods
-

🍕 Little Caesars Crazy Puffs (Made in a Cupcake Pan!)

If you’ve ever had Little Caesars Crazy Puffs, you already know they’re one of those can’t-stop-eating snacks — soft dough, melty cheese, zesty pepperoni, and that buttery garlic flavor that hits just right. The only problem? They disappear fast and don’t come cheap!
So, I decided to make my own copycat Crazy Puffs right at home — using just a can of crescent dough, a few pantry staples, and my trusty cupcake tray. The result? Golden, cheesy, garlicky little pizza cups that taste just like the real deal (if not better). These are perfect for family movie nights, game days, or when that pizza craving hits but you don’t want to order out.
🧄 Ingredients You’ll Need:
- 1 package crescent dough
- Olive oil (for brushing)
- Italian seasoning, to taste
- Garlic powder, to taste
- Mozzarella or pizza blend cheese
- Pepperoni slices
Optional: Melted butter for brushing after baking (for that Crazy Bread-style finish!)
👩🏽🍳 How to Make Copycat Crazy Puffs:
- Preheat your oven to 375°F.
- Lightly grease a cupcake pan with olive oil or nonstick spray.
- Unroll your crescent dough and cut it into 8 even squares (press the seams together if needed).
- Press each dough square into a cupcake cup, shaping it like a little bowl — make sure some dough hangs over the edge so it can puff up beautifully.
- First layer: Add a small spoonful of shredded cheese and one slice of pepperoni to the bottom.
- Second layer: Add another sprinkle of cheese and another slice of pepperoni right on top — because one layer just isn’t enough! 😋
- Brush the tops lightly with olive oil and sprinkle with garlic powder and Italian seasoning.
- Bake for 12–15 minutes, or until golden brown, bubbly, and slightly crisp on the edges.
- Optional finishing touch: Brush with melted butter and a pinch more garlic powder and Italian seasoning right after baking for that signature Crazy Bread flavor.
🍽️ Serving Ideas:
Serve your puffs warm with a side of marinara sauce, pizza sauce, or even ranch dressing for dipping. These are perfect for:
- After-school snacks 🍴
- Game night appetizers 🏈
- Party trays or potlucks 🎉
- A fun pizza-night twist for the family 🍕
💡 Tips for Perfect Crazy Puffs:
- Use a cupcake pan — it helps the dough puff up and hold all that cheesy filling.
- Don’t skip the butter at the end! It makes them taste exactly like Little Caesars’ buttery, garlicky goodness.
- Try different toppings — sausage, cooked bacon, or even diced veggies work great too.
- Serve hot and fresh — they taste best right out of the oven when the cheese is still melty and gooey.
❤️ Why You’ll Love These:
- Made with simple grocery store ingredients
- No pizza dough kneading required
- Ready in about 20 minutes
- Family and kid-approved
- Perfect Little Caesars dupe — but even fresher!
📌 Save this recipe to your Easy Snacks, Copycat Recipes, or Family Favorites board — because once you make these, you’ll never look at regular pizza the same again!
-
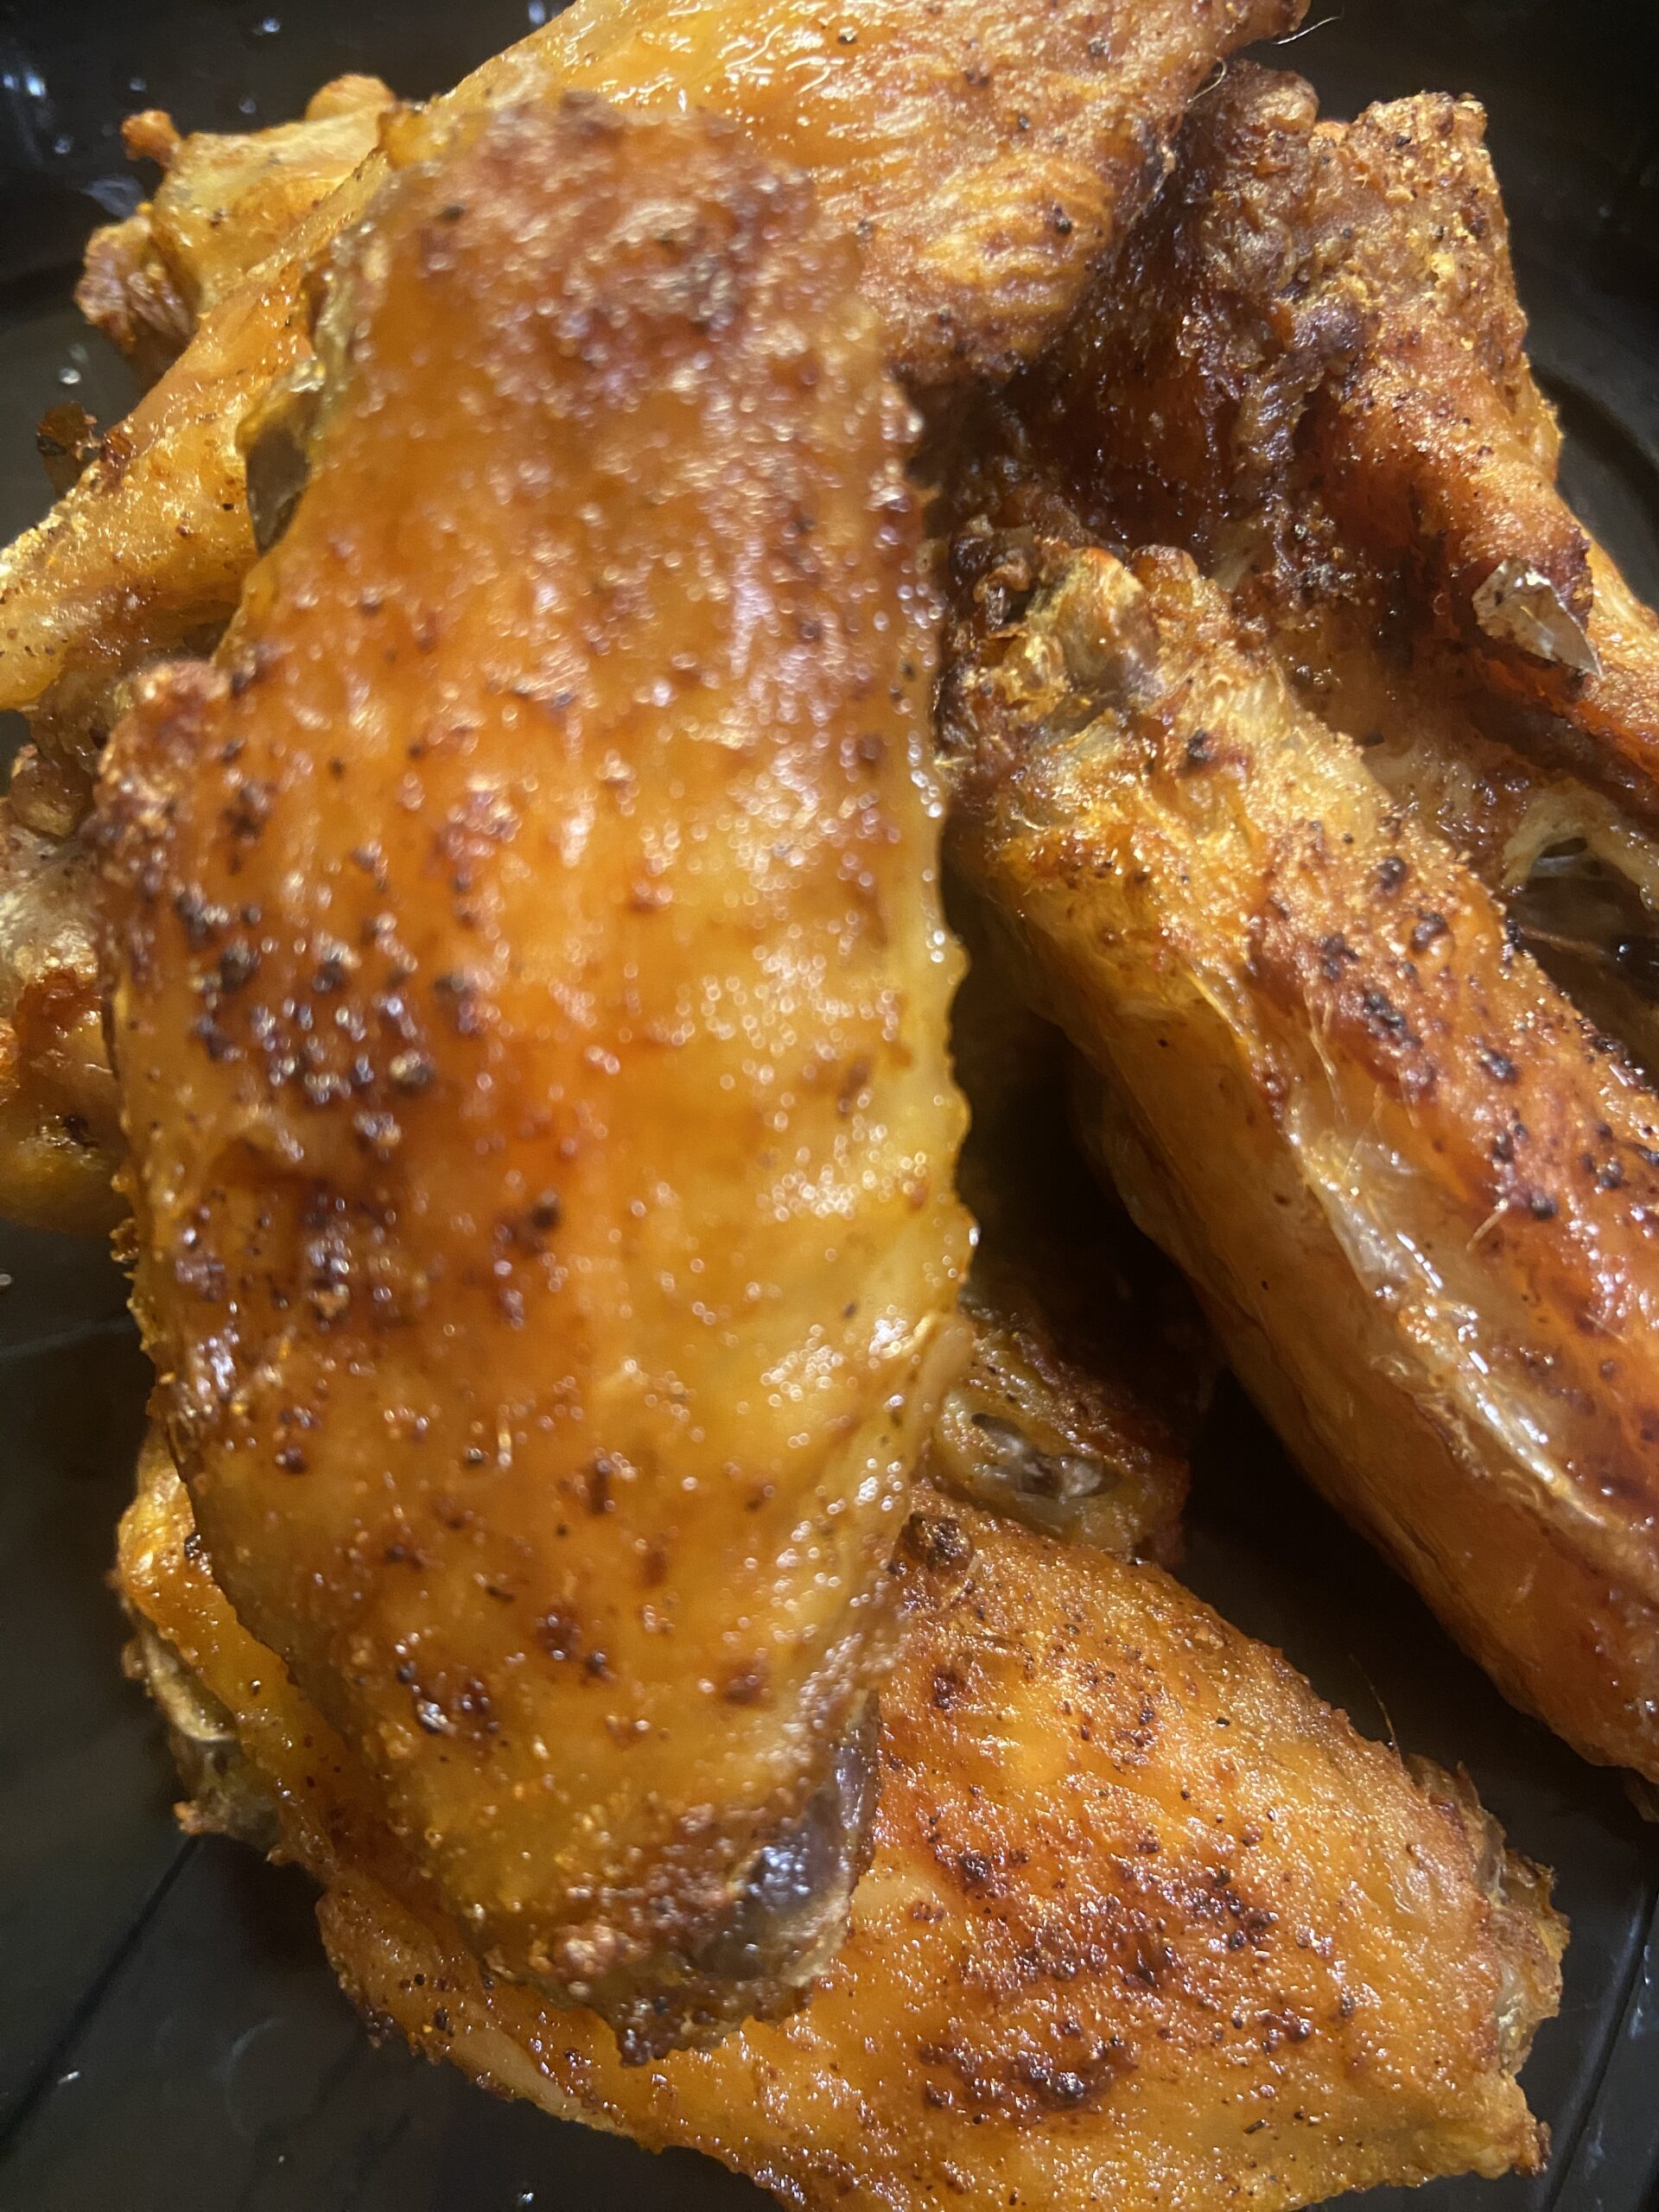
Quick & Crispy Air Fryer Chicken Wings You’ll Make Every Week

When you want wings that are bold, flavorful, and perfectly crispy without deep-frying, the air fryer is your best friend. These Mustard & Creole Air Fryer Wings have the perfect mix of tangy mustard, Tony’s Creole seasoning, garlic, and onion powder—all tied together with a light cornstarch coating for that irresistible crunch.
Whether you’re making them for game day, a quick weeknight dinner, or a snack platter, these wings are guaranteed to disappear fast!
Why You’ll Love These Wings
- Crispy without deep frying – The air fryer gives them golden crunch with less oil.
- Flavor-packed – Mustard brings tang, while Creole seasoning adds that signature kick.
- Quick & easy – From prep to plate in under 30 minutes.
- Versatile – Eat them dry, or toss them in your favorite wing sauce.
Ingredients You’ll Need
- 2 lbs chicken wings (flats and drums, separated)
- 2 tbsp yellow mustard (Dijon works if you like more tang)
- 1 ½ tbsp cornstarch (for crunch)
- 1 tbsp oil (vegetable, canola, or olive)
- 1 tbsp Tony’s Creole seasoning (adjust to taste)
- 1 tsp garlic powder
- 1 tsp onion powder
Step-by-Step Instructions
1. Prep the Wings
Pat your chicken wings really dry with paper towels—this step is key to getting crispy skin.
2. Coat & Season
In a large bowl, toss the wings with mustard and oil until evenly coated.
Sprinkle on cornstarch, Creole seasoning, garlic, and onion powder. Toss again until every wing is coated.3. Preheat the Air Fryer
Set your air fryer to 390°F for 3–5 minutes.
4. Cook the Wings
Arrange the wings in a single layer (work in batches if needed).
Air fry for 18–22 minutes, flipping halfway through. For extra crispiness, bump the temp up to 400°F for the last 3–4 minutes.5. Serve & Enjoy
Enjoy hot as they are, or toss in extra sauce—buffalo, honey mustard, or even BBQ all work great with this base seasoning.
Tips for the Crispiest Air Fryer Wings
- Don’t skip drying the wings before seasoning.
- Cook in a single layer—crowding = soggy wings.
- Want more heat? Add cayenne or hot sauce to the mustard mix.
- Like saucy wings? Toss them after air frying to keep the skin crisp.
- Cook longer if you like them extra crunchy—air fryers vary, so test your perfect level of crisp!
What to Serve With These Wings
Pair with:
- Ranch or blue cheese dip
- Celery & carrot sticks
- Cornbread muffins or your favorite Southern sides
-
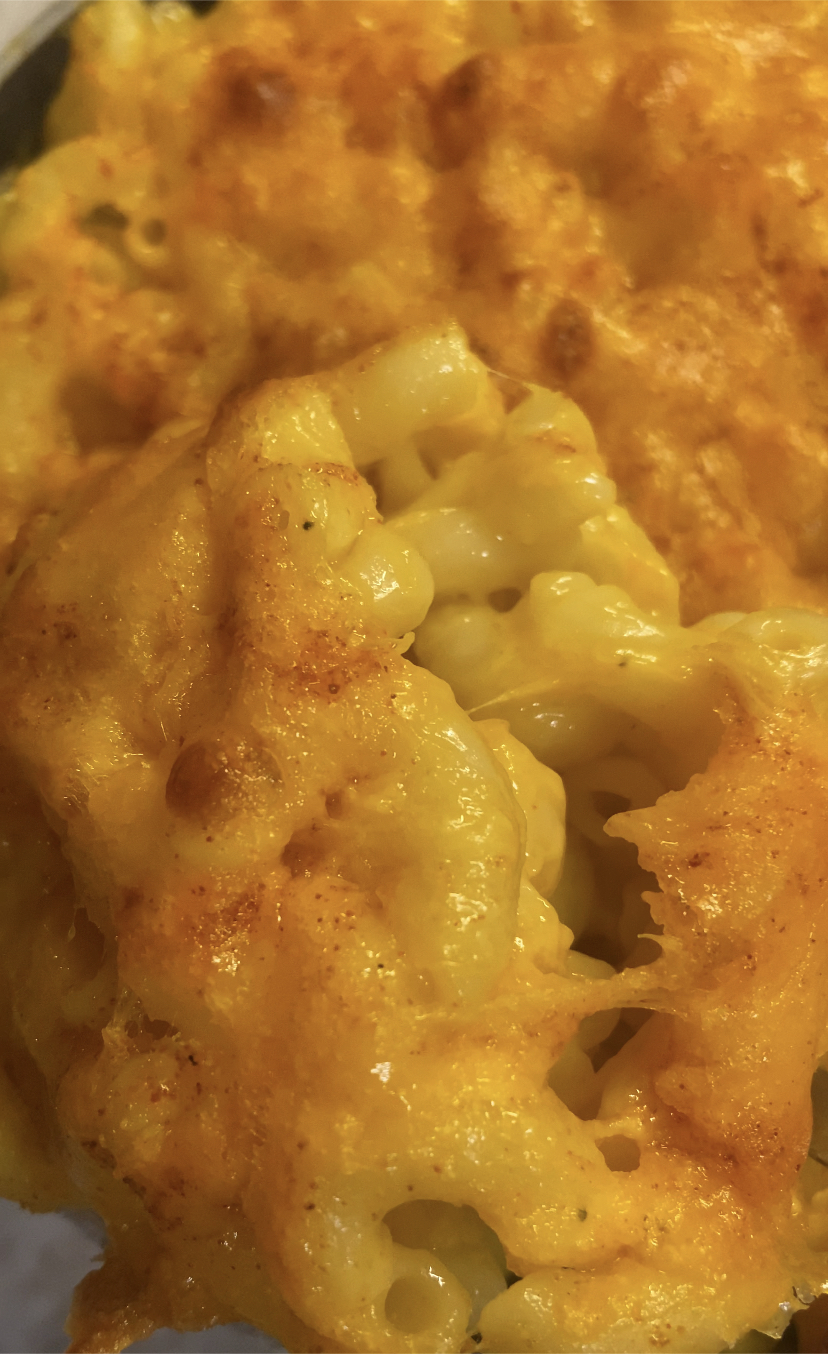
Easy One-Cheese Baked Macaroni (Weeknight, Kid & Adult Approved!)

When it comes to comfort food, nothing beats a bubbling dish of baked macaroni and cheese. But sometimes you just need something simple—no fuss, no long list of ingredients, just real cheesy goodness. That’s where this Super Easy One-Cheese Baked Macaroni comes in.
With just a box of pasta, a bag of sharp cheddar, and a few pantry staples, you can have a family-friendly dinner that feels special without taking all night. The stovetop prep is quick, and finishing it off in the oven gives you that golden, cheesy topping everyone loves.
Kids will devour it, adults will sneak seconds, and you’ll appreciate how fast and budget-friendly it is.
Recipe: Super Easy One-Cheese Baked Macaroni
Servings: 4–6
Time: 35 minutesIngredients:
- 1 (16 oz) box elbow macaroni (or any short pasta)
- 2 ½ cups shredded sharp cheddar cheese (divided)
- ½ stick (4 tbsp) unsalted butter
- Salt (for pasta water + seasoning)
- ½ tsp black pepper (or to taste)
- ½ tsp paprika (optional, for flavor and color)
Instructions:
- Cook the pasta
- Bring a large pot of salted water to a boil.
- Add macaroni and cook according to package directions until al dente.
- Drain and transfer pasta to a large mixing bowl.
- Mix the base
- While pasta is still warm, add butter and stir until melted.
- Add about 2 cups of shredded sharp cheddar cheese, mixing until melted and creamy.
- Season with salt, black pepper, and paprika to taste.
- Assemble for baking
- Pour the cheesy pasta mixture into a lightly greased baking dish.
- Top evenly with the remaining ½ cup shredded cheddar cheese.
- Bake
- Place in a preheated oven at 375°F (190°C) for about 15–20 minutes, or until the top is melted, bubbly, and slightly golden.
- Serve
- Spoon into bowls or onto plates and enjoy hot!
Tips & Tricks:
- For extra creaminess, mix in a splash of milk with the cheese.
- Want a little crunch? Sprinkle breadcrumbs mixed with melted butter on top before baking.
- Leftovers reheat best in the oven with a touch of extra cheese.
This baked version takes your one-cheese macaroni up a notch—crispy on top, gooey in the middle, and still super easy. Perfect for busy weeknights, family dinners, or when you just want cozy comfort food without the effort.
-

How to Create Stunning Grazing Boards for Your Next Party

Disclosure: This post may contain affiliate links. If you make a purchase through these links, I may earn a small commission at no extra cost to you.
Grazing boards have taken the entertaining world by storm, and for good reason. These beautiful, bountiful boards are perfect for any occasion, offering a delicious variety of foods that appeal to every palate. Whether you’re hosting a casual get-together or a formal event, a well-crafted grazing board is sure to impress your guests.
Here’s a guide to creating the ultimate grazing board, complete with a list of must-have items to include.
Step 1: Choose Your Theme
Before you start assembling your grazing board, decide on a theme that aligns with your event. Some popular themes include:
- Classic Charcuterie: A mix of meats, cheeses, and crackers.
- Sweet Treats: Desserts and candies.
- Breakfast Spread: Bagels, spreads, and fruits.
- Seasonal Flair: Incorporate foods that reflect the season.
Your theme will guide your choices for ingredients, colors, and presentation style.
Step 2: Select the Base Click here for grazing board
You’ll need a sturdy surface for your grazing board. Options include:
- Wooden cutting boards
- Slate or marble trays
- Large serving platters
- Parchment paper laid directly on a clean table for a rustic look
Step 3: Plan Your Food Selection
A balanced grazing board includes a variety of textures, flavors, and colors. Use this list to inspire your selection:
1. Cheeses:
- Aged (e.g., cheddar, gouda)
- Soft (e.g., brie, camembert)
- Blue (e.g., gorgonzola, stilton)
- Fresh (e.g., mozzarella, goat cheese)
2. Meats:
- Cured meats (e.g., prosciutto, salami, chorizo)
- Smoked meats (e.g., smoked turkey or ham)
3. Crackers and Breads:
- Assorted crackers (e.g., multigrain, sesame, water crackers)
- Sliced baguette
- Breadsticks
4. Fresh Fruits:
- Grapes
- Berries (e.g., strawberries, blueberries, raspberries)
- Apple or pear slices (brush with lemon juice to prevent browning)
5. Dried Fruits and Nuts:
- Dried apricots, figs, or mango slices
- Almonds, cashews, or pistachios
- Candied pecans
6. Vegetables:
- Baby carrots
- Cherry tomatoes
- Cucumber slices
- Bell pepper strips
7. Dips and Spreads:
- Hummus
- Olive tapenade
- Honey or fruit preserves
- Mustard or aioli
8. Extras for Flair:
- Fresh herbs (e.g., rosemary, thyme)
- Edible flowers
- Dark chocolate pieces or truffles
Step 4: Assemble the Board
When assembling your grazing board, keep these tips in mind:
- Start with the larger items: Place cheeses, bowls for dips, and bigger fruits like grapes first.
- Add meats: Arrange them in folds or rolls for visual interest.
- Fill gaps with smaller items: Use crackers, nuts, and smaller fruits to fill any empty spaces.
- Balance colors and textures: Distribute bright and neutral tones evenly for a harmonious look.
- Garnish: Finish with fresh herbs or edible flowers for added elegance.
Step 5: Serve and Enjoy
Set your grazing board out shortly before guests arrive to keep everything fresh. Include small serving utensils like cheese knives, tongs, and spoons to make it easy for guests to help themselves.
Final Thoughts
Creating a grazing board is as much an art as it is a science. With the right mix of ingredients and a touch of creativity, your board will be a show-stopping centerpiece at your next party. Don’t be afraid to experiment and adapt the board to your tastes or dietary preferences. Happy grazing!