Your cart is currently empty!
Tag: easy recipes
-

🍕 Little Caesars Crazy Puffs (Made in a Cupcake Pan!)

If you’ve ever had Little Caesars Crazy Puffs, you already know they’re one of those can’t-stop-eating snacks — soft dough, melty cheese, zesty pepperoni, and that buttery garlic flavor that hits just right. The only problem? They disappear fast and don’t come cheap!
So, I decided to make my own copycat Crazy Puffs right at home — using just a can of crescent dough, a few pantry staples, and my trusty cupcake tray. The result? Golden, cheesy, garlicky little pizza cups that taste just like the real deal (if not better). These are perfect for family movie nights, game days, or when that pizza craving hits but you don’t want to order out.
🧄 Ingredients You’ll Need:
- 1 package crescent dough
- Olive oil (for brushing)
- Italian seasoning, to taste
- Garlic powder, to taste
- Mozzarella or pizza blend cheese
- Pepperoni slices
Optional: Melted butter for brushing after baking (for that Crazy Bread-style finish!)
👩🏽🍳 How to Make Copycat Crazy Puffs:
- Preheat your oven to 375°F.
- Lightly grease a cupcake pan with olive oil or nonstick spray.
- Unroll your crescent dough and cut it into 8 even squares (press the seams together if needed).
- Press each dough square into a cupcake cup, shaping it like a little bowl — make sure some dough hangs over the edge so it can puff up beautifully.
- First layer: Add a small spoonful of shredded cheese and one slice of pepperoni to the bottom.
- Second layer: Add another sprinkle of cheese and another slice of pepperoni right on top — because one layer just isn’t enough! 😋
- Brush the tops lightly with olive oil and sprinkle with garlic powder and Italian seasoning.
- Bake for 12–15 minutes, or until golden brown, bubbly, and slightly crisp on the edges.
- Optional finishing touch: Brush with melted butter and a pinch more garlic powder and Italian seasoning right after baking for that signature Crazy Bread flavor.
🍽️ Serving Ideas:
Serve your puffs warm with a side of marinara sauce, pizza sauce, or even ranch dressing for dipping. These are perfect for:
- After-school snacks 🍴
- Game night appetizers 🏈
- Party trays or potlucks 🎉
- A fun pizza-night twist for the family 🍕
💡 Tips for Perfect Crazy Puffs:
- Use a cupcake pan — it helps the dough puff up and hold all that cheesy filling.
- Don’t skip the butter at the end! It makes them taste exactly like Little Caesars’ buttery, garlicky goodness.
- Try different toppings — sausage, cooked bacon, or even diced veggies work great too.
- Serve hot and fresh — they taste best right out of the oven when the cheese is still melty and gooey.
❤️ Why You’ll Love These:
- Made with simple grocery store ingredients
- No pizza dough kneading required
- Ready in about 20 minutes
- Family and kid-approved
- Perfect Little Caesars dupe — but even fresher!
📌 Save this recipe to your Easy Snacks, Copycat Recipes, or Family Favorites board — because once you make these, you’ll never look at regular pizza the same again!
-
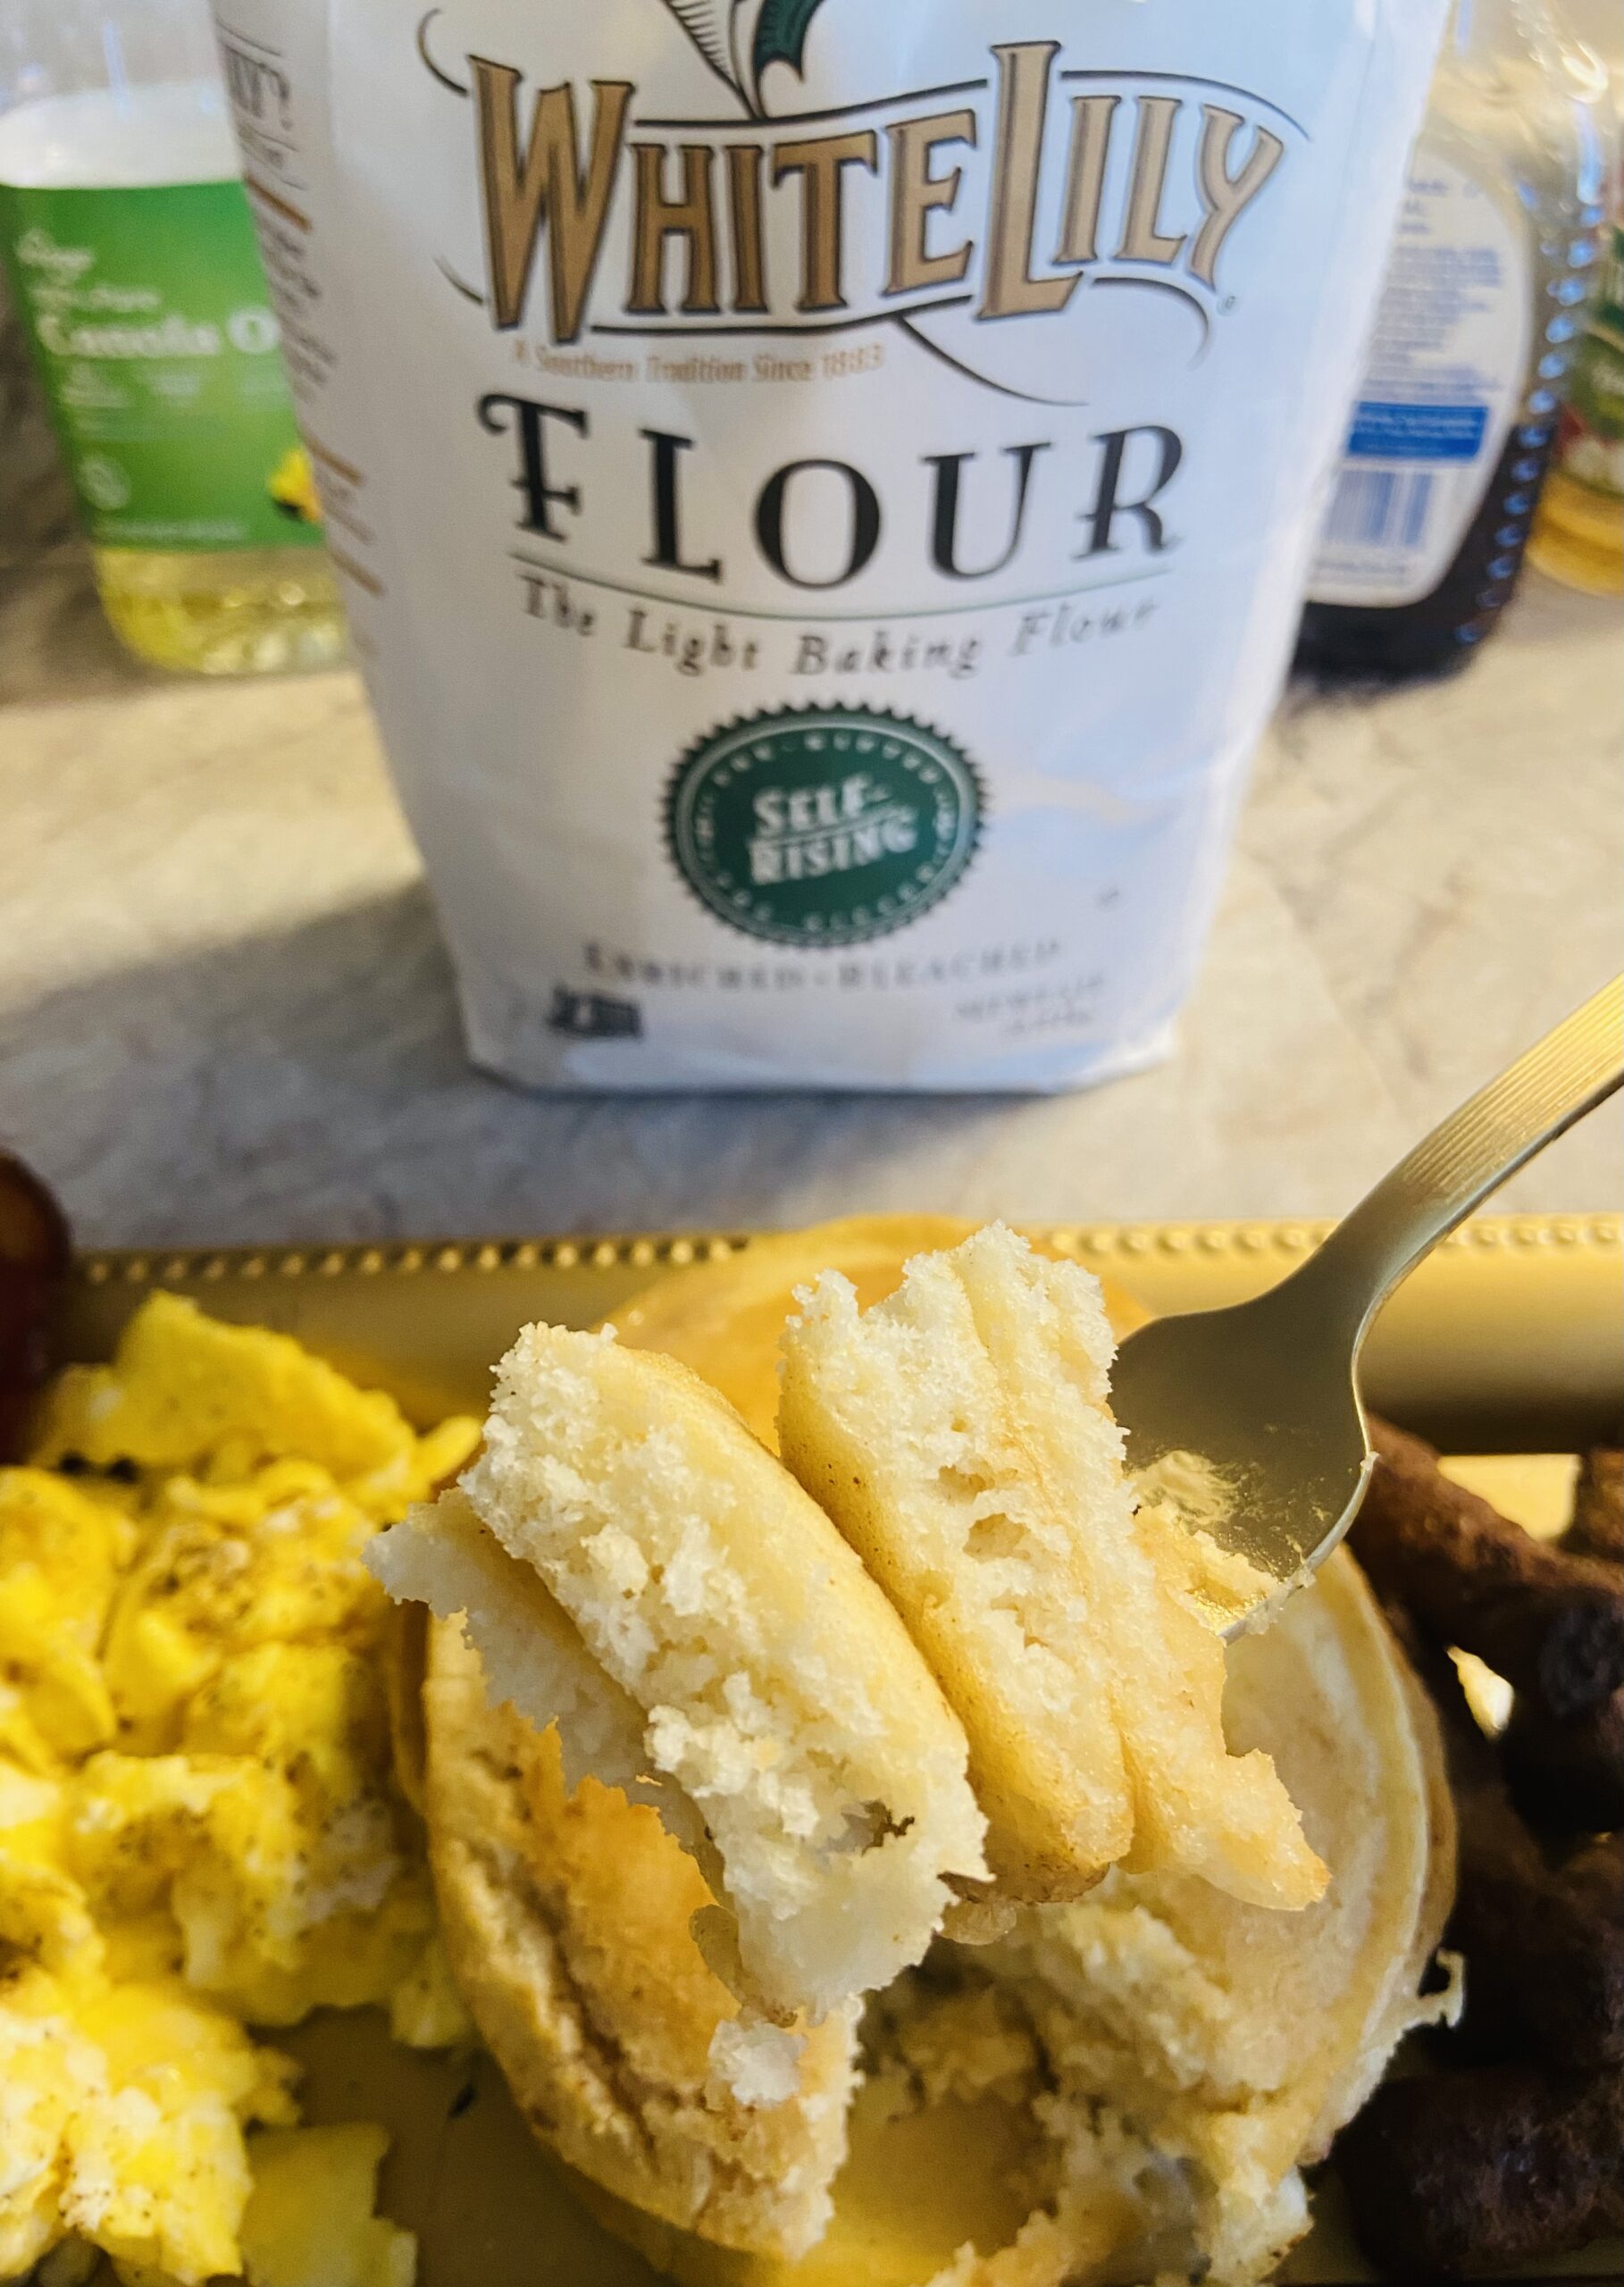
Easy Fluffy White Lily Pancakes Recipe (Kid approved)

There’s nothing like waking up to the smell of pancakes sizzling on the stovetop. Around here, pancakes aren’t just breakfast—they’re comfort food, weekend traditions, and a little taste of home. When you use White Lily flour, you’re guaranteed pancakes that are soft, fluffy, and tender. This recipe is simple, quick, and made with ingredients you probably already have in your kitchen.
I grew up learning that the secret to the perfect pancake is the flour, and White Lily never disappoints. These pancakes cook up golden brown with buttery crisp edges and a pillowy center. Pair them with warm syrup, fresh berries, or a pat of butter melting on top, and you’ve got the perfect start to your morning.
Ingredients
- 1 ½ cups White Lily all-purpose flour
- 1 large egg
- 1 tsp vanilla extract
- 2 tbsp sugar
- 1 ¼ cups milk
- 3 tbsp melted butter (plus extra for serving)
- Crisco + butter (for frying)
Instructions
- Mix the batter: In a large bowl, whisk together the flour and sugar. In a separate bowl, beat the egg with the milk, vanilla, and melted butter. Slowly pour the wet ingredients into the dry, mixing until just combined. (Don’t overmix—your pancakes will stay fluffy this way.)
- Heat the skillet: Add a little Crisco and a small pat of butter to your skillet or griddle. Heat over medium until the butter is melted and bubbling. This blend gives the pancakes a beautiful golden color and crispy edges.
- Cook the pancakes: Pour about ¼ cup of batter onto the hot skillet for each pancake. Cook until bubbles form on the surface and the edges start to set, then flip and cook the other side until golden brown.
- Serve: Stack your pancakes high, drizzle with warm syrup, or add your favorite toppings like fresh fruit, whipped cream, or a dusting of powdered sugar.
Tips for the Best White Lily Pancakes
- Don’t press down on the pancakes while cooking—let them rise naturally.
- Use whole milk for richer flavor, but you can swap for 2% or even buttermilk for a tangy twist.
- Keep cooked pancakes warm in a 200°F oven until ready to serve.
Why White Lily Flour Makes a Difference
White Lily flour is milled from soft winter wheat, which has a lower protein content than most flours. That means it produces lighter, fluffier baked goods—perfect for pancakes, biscuits, and cakes. It’s the not-so-secret ingredient Southern kitchens have trusted for generations.
✨ Pin this recipe to your breakfast board so you can always find it when Saturday morning pancake cravings hit!
-
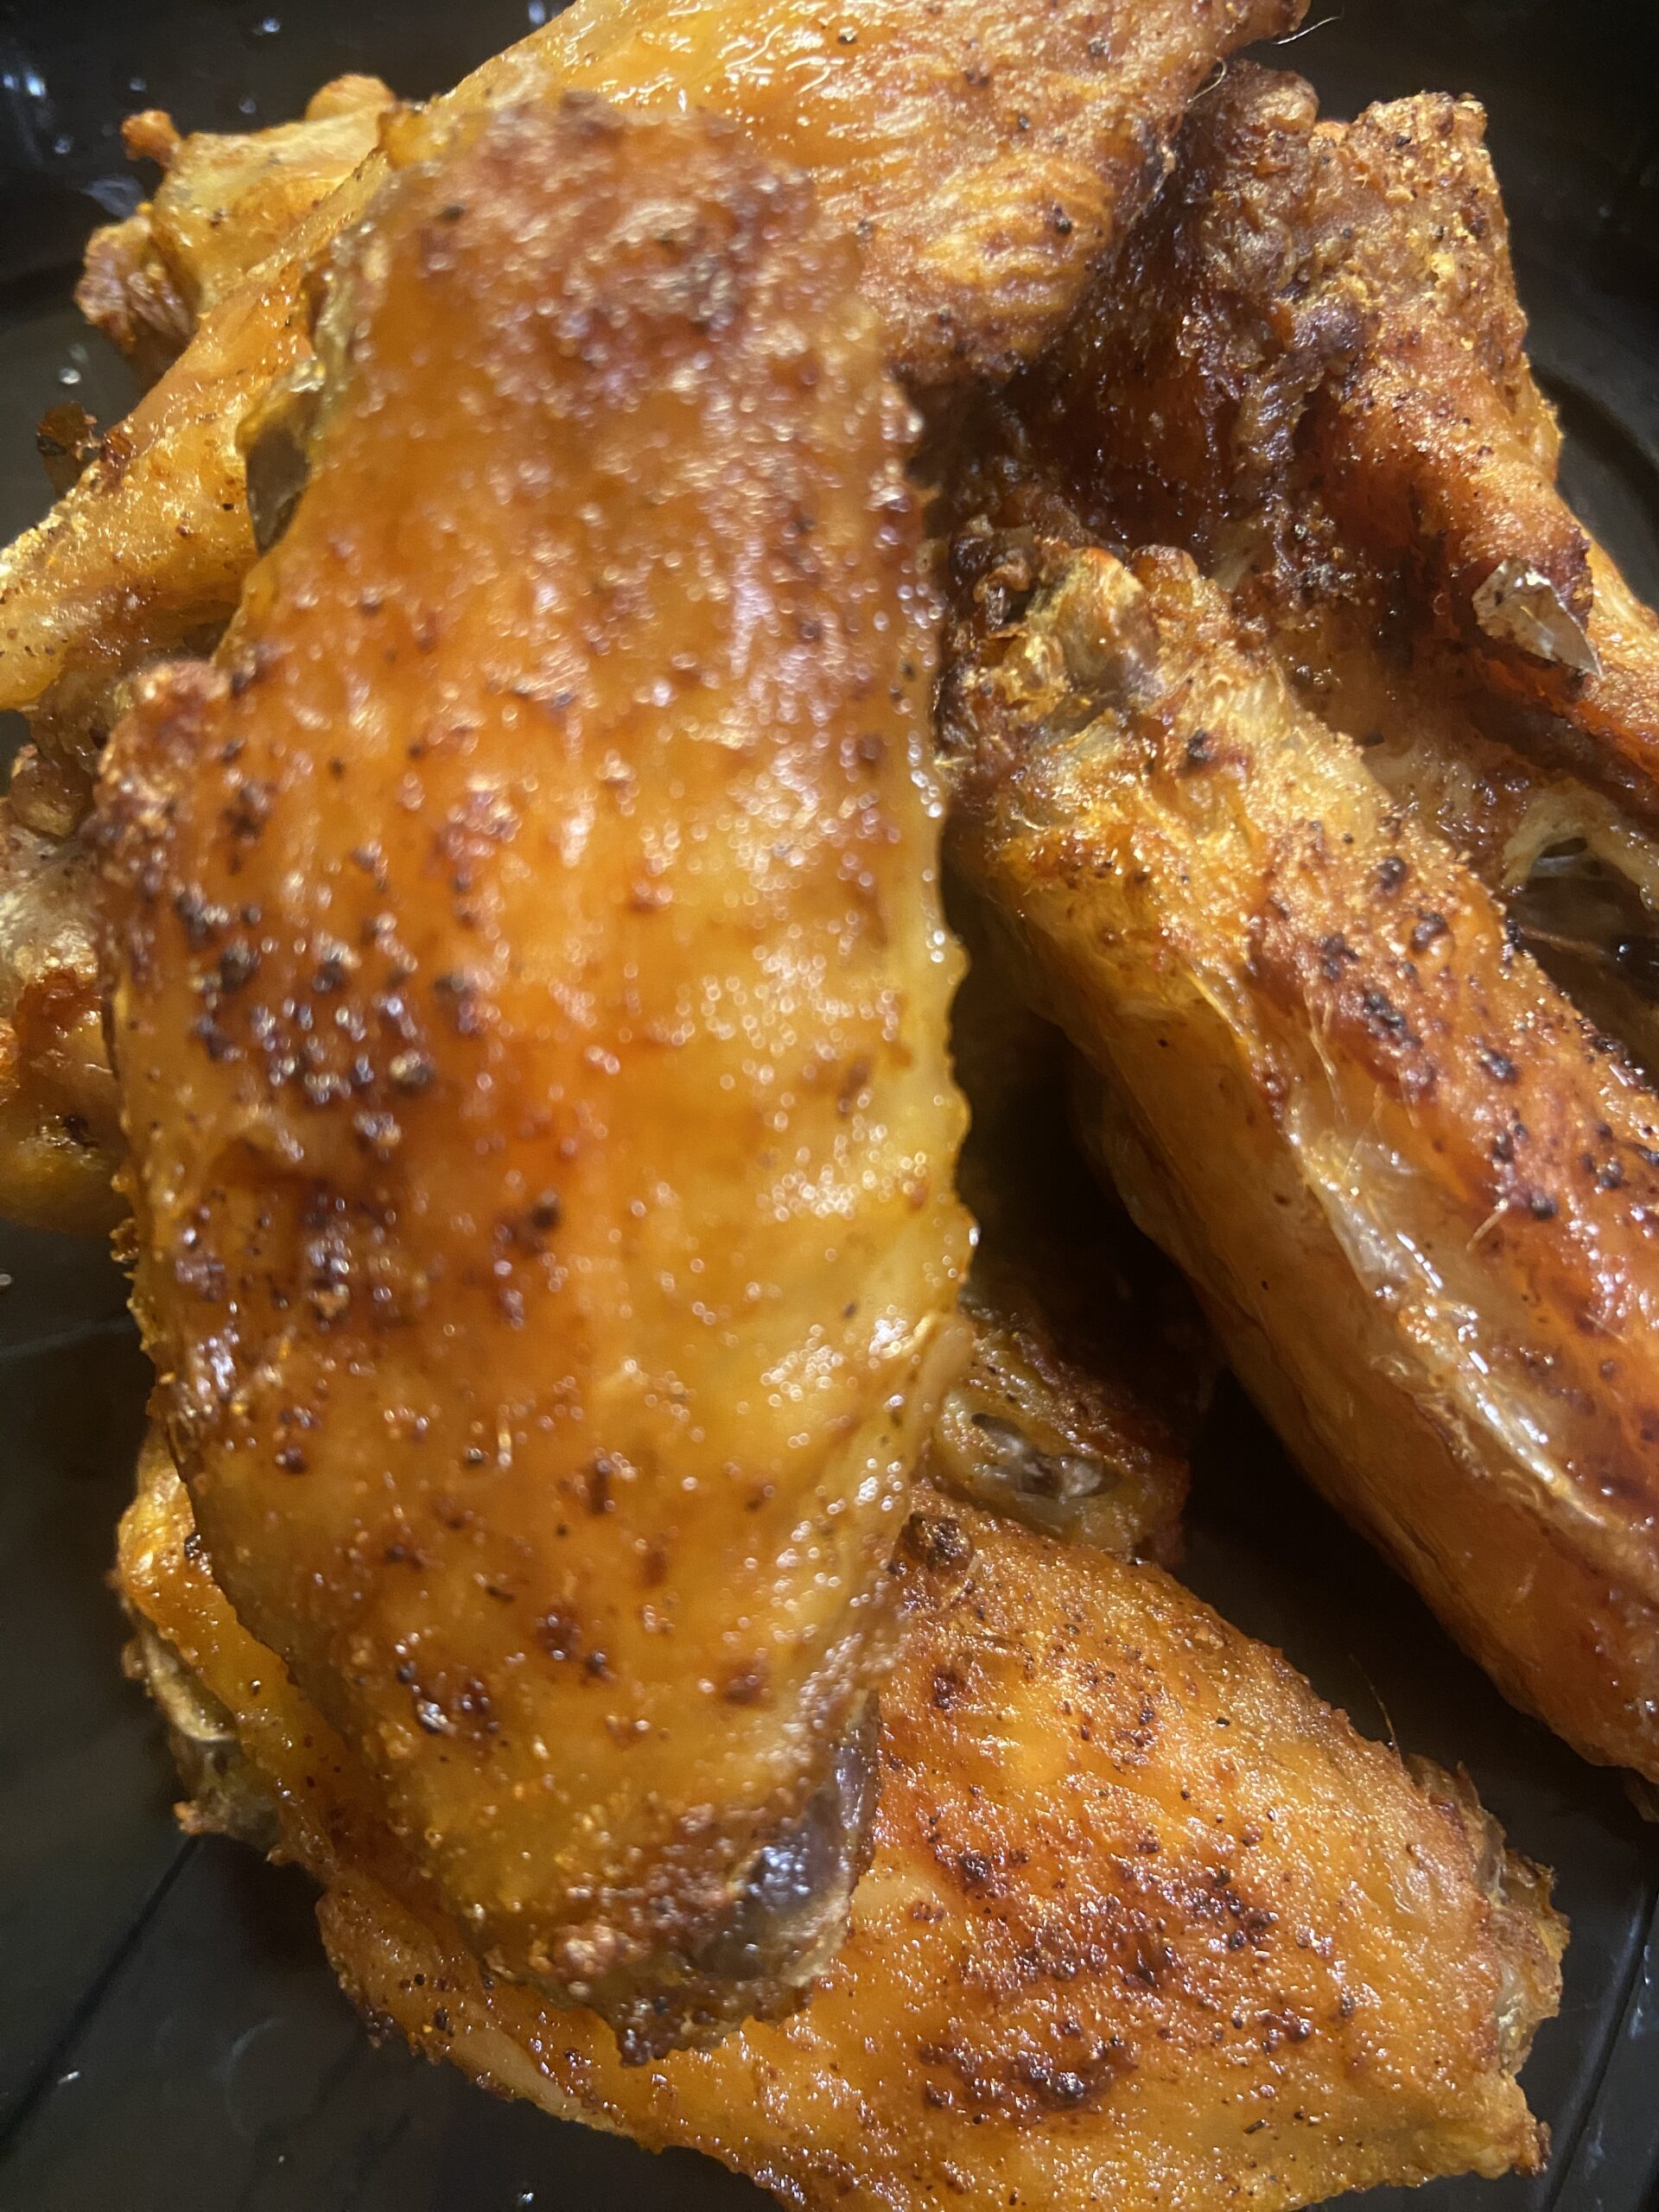
Quick & Crispy Air Fryer Chicken Wings You’ll Make Every Week

When you want wings that are bold, flavorful, and perfectly crispy without deep-frying, the air fryer is your best friend. These Mustard & Creole Air Fryer Wings have the perfect mix of tangy mustard, Tony’s Creole seasoning, garlic, and onion powder—all tied together with a light cornstarch coating for that irresistible crunch.
Whether you’re making them for game day, a quick weeknight dinner, or a snack platter, these wings are guaranteed to disappear fast!
Why You’ll Love These Wings
- Crispy without deep frying – The air fryer gives them golden crunch with less oil.
- Flavor-packed – Mustard brings tang, while Creole seasoning adds that signature kick.
- Quick & easy – From prep to plate in under 30 minutes.
- Versatile – Eat them dry, or toss them in your favorite wing sauce.
Ingredients You’ll Need
- 2 lbs chicken wings (flats and drums, separated)
- 2 tbsp yellow mustard (Dijon works if you like more tang)
- 1 ½ tbsp cornstarch (for crunch)
- 1 tbsp oil (vegetable, canola, or olive)
- 1 tbsp Tony’s Creole seasoning (adjust to taste)
- 1 tsp garlic powder
- 1 tsp onion powder
Step-by-Step Instructions
1. Prep the Wings
Pat your chicken wings really dry with paper towels—this step is key to getting crispy skin.
2. Coat & Season
In a large bowl, toss the wings with mustard and oil until evenly coated.
Sprinkle on cornstarch, Creole seasoning, garlic, and onion powder. Toss again until every wing is coated.3. Preheat the Air Fryer
Set your air fryer to 390°F for 3–5 minutes.
4. Cook the Wings
Arrange the wings in a single layer (work in batches if needed).
Air fry for 18–22 minutes, flipping halfway through. For extra crispiness, bump the temp up to 400°F for the last 3–4 minutes.5. Serve & Enjoy
Enjoy hot as they are, or toss in extra sauce—buffalo, honey mustard, or even BBQ all work great with this base seasoning.
Tips for the Crispiest Air Fryer Wings
- Don’t skip drying the wings before seasoning.
- Cook in a single layer—crowding = soggy wings.
- Want more heat? Add cayenne or hot sauce to the mustard mix.
- Like saucy wings? Toss them after air frying to keep the skin crisp.
- Cook longer if you like them extra crunchy—air fryers vary, so test your perfect level of crisp!
What to Serve With These Wings
Pair with:
- Ranch or blue cheese dip
- Celery & carrot sticks
- Cornbread muffins or your favorite Southern sides
-
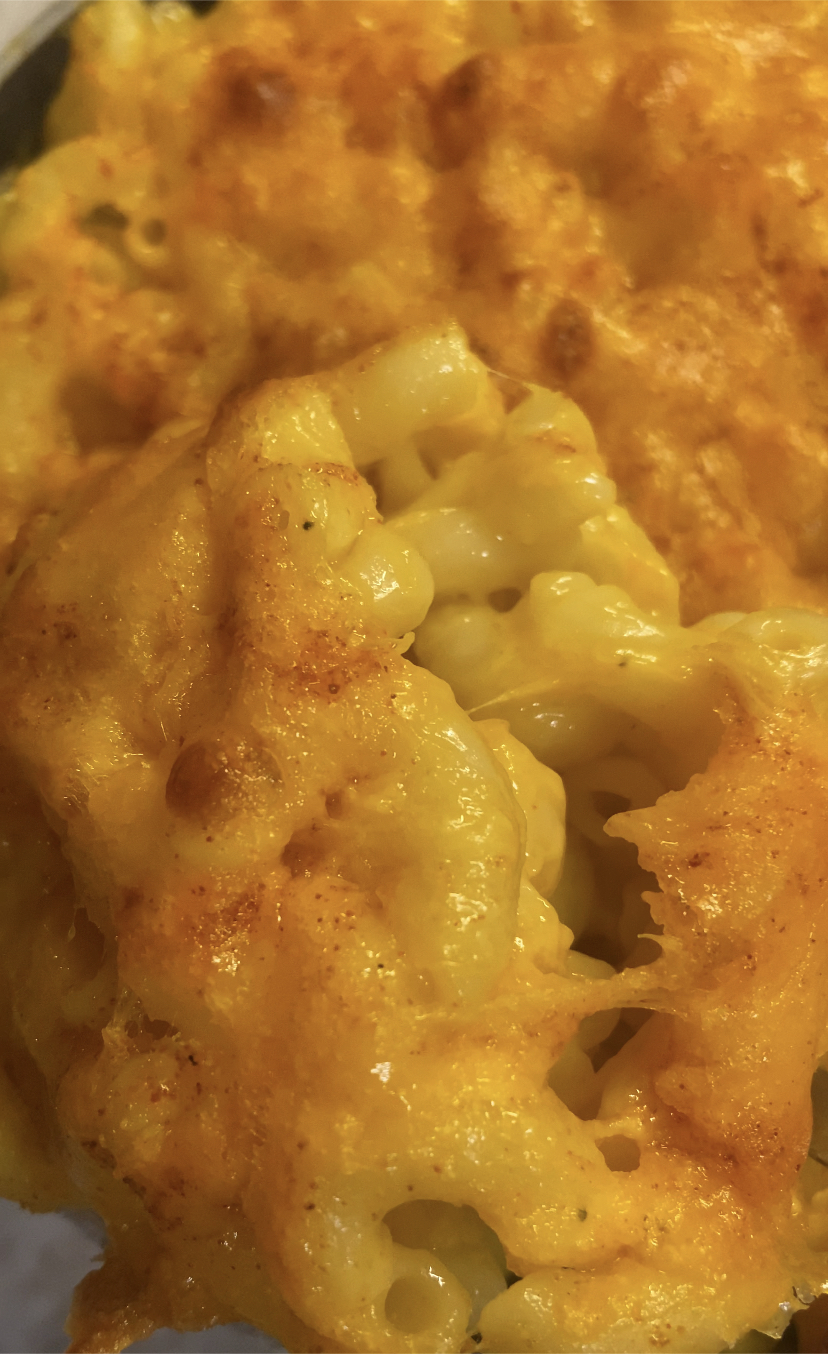
Easy One-Cheese Baked Macaroni (Weeknight, Kid & Adult Approved!)

When it comes to comfort food, nothing beats a bubbling dish of baked macaroni and cheese. But sometimes you just need something simple—no fuss, no long list of ingredients, just real cheesy goodness. That’s where this Super Easy One-Cheese Baked Macaroni comes in.
With just a box of pasta, a bag of sharp cheddar, and a few pantry staples, you can have a family-friendly dinner that feels special without taking all night. The stovetop prep is quick, and finishing it off in the oven gives you that golden, cheesy topping everyone loves.
Kids will devour it, adults will sneak seconds, and you’ll appreciate how fast and budget-friendly it is.
Recipe: Super Easy One-Cheese Baked Macaroni
Servings: 4–6
Time: 35 minutesIngredients:
- 1 (16 oz) box elbow macaroni (or any short pasta)
- 2 ½ cups shredded sharp cheddar cheese (divided)
- ½ stick (4 tbsp) unsalted butter
- Salt (for pasta water + seasoning)
- ½ tsp black pepper (or to taste)
- ½ tsp paprika (optional, for flavor and color)
Instructions:
- Cook the pasta
- Bring a large pot of salted water to a boil.
- Add macaroni and cook according to package directions until al dente.
- Drain and transfer pasta to a large mixing bowl.
- Mix the base
- While pasta is still warm, add butter and stir until melted.
- Add about 2 cups of shredded sharp cheddar cheese, mixing until melted and creamy.
- Season with salt, black pepper, and paprika to taste.
- Assemble for baking
- Pour the cheesy pasta mixture into a lightly greased baking dish.
- Top evenly with the remaining ½ cup shredded cheddar cheese.
- Bake
- Place in a preheated oven at 375°F (190°C) for about 15–20 minutes, or until the top is melted, bubbly, and slightly golden.
- Serve
- Spoon into bowls or onto plates and enjoy hot!
Tips & Tricks:
- For extra creaminess, mix in a splash of milk with the cheese.
- Want a little crunch? Sprinkle breadcrumbs mixed with melted butter on top before baking.
- Leftovers reheat best in the oven with a touch of extra cheese.
This baked version takes your one-cheese macaroni up a notch—crispy on top, gooey in the middle, and still super easy. Perfect for busy weeknights, family dinners, or when you just want cozy comfort food without the effort.
-
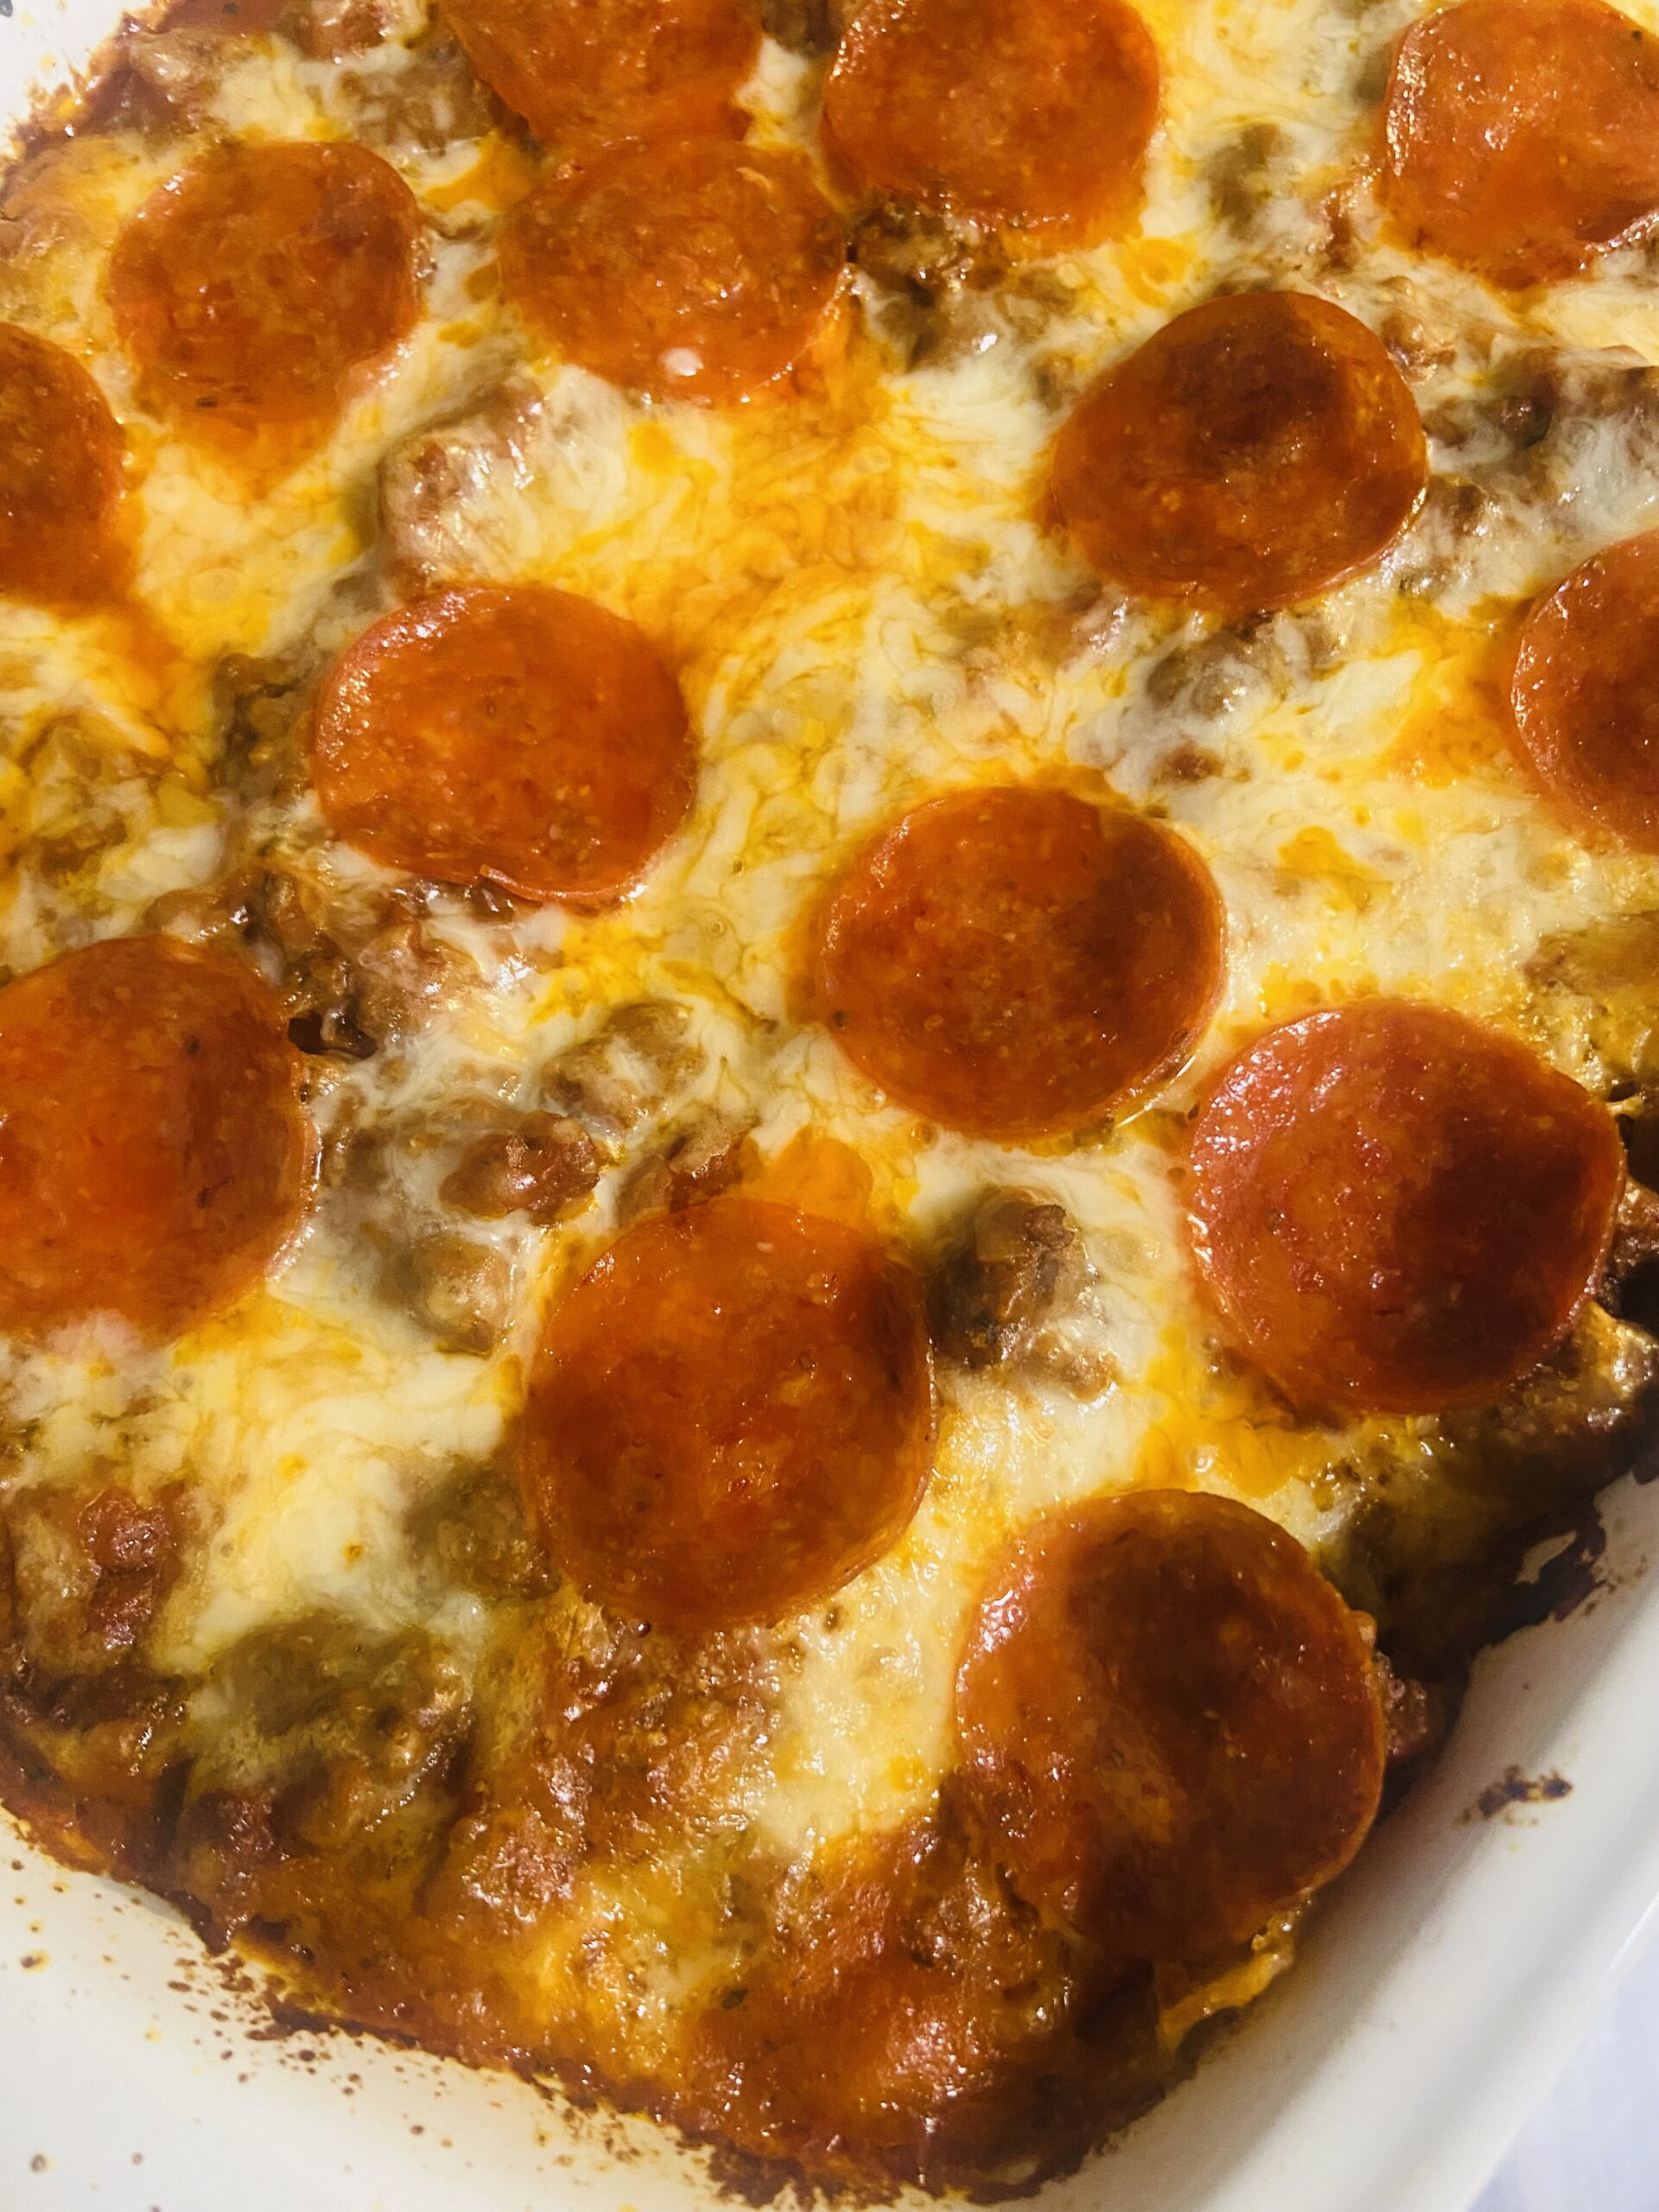
Easy Pepperoni Mozzarella Lasagna (Pizza-Inspired!)

Lasagna is one of those comfort meals that feels like a hug on a plate—but sometimes you just want a simpler, quicker version without losing that cheesy, saucy goodness. That’s where this Easy Pepperoni Mozzarella Lasagna comes in. Made with Kroger brand lasagna noodles, Ragu chunky pasta sauce, layers of mozzarella cheese, and plenty of pepperoni, this dish is a fun, pizza-inspired twist that the whole family will love.
The best part? It comes together in one 9×11 pan and bakes up bubbly, golden, and irresistible.
Ingredients
- 1 box Kroger brand lasagna noodles (regular, not oven-ready)
- 1 jar (about 24 oz) Ragu chunky pasta sauce
- 2 cups mozzarella cheese, shredded (add more if you love it extra cheesy!)
- 1 package pepperoni slices
- 1–2 tablespoons olive oil (for noodles, optional)
- Salt for boiling water
Instructions
- Cook the noodles
- Bring a large pot of salted water to a boil. Cook Kroger lasagna noodles according to package directions until al dente. Drain and drizzle lightly with olive oil to prevent sticking.
- Layer the lasagna
- Preheat oven to 375°F.
- Spread a thin layer of Ragu chunky sauce on the bottom of a 9×11 baking dish.
- Add a single layer of noodles.
- Spread more sauce over the noodles, sprinkle with mozzarella, and add a layer of pepperoni slices.
- Repeat the layers (noodles → sauce → cheese → pepperoni) until all ingredients are used. Finish with a generous layer of mozzarella and pepperoni on top.
- Bake
- Cover loosely with foil and bake for 25 minutes.
- Remove foil and bake an additional 10–15 minutes, until cheese is melted, bubbly, and lightly golden.
- Serve
- Let lasagna rest for 10 minutes before slicing. This helps it set up and makes serving easier.
Tips & Variations
- Add extra mozzarella between the layers if you’re a cheese-lover.
- Sprinkle a little Italian seasoning or red pepper flakes for extra flavor.
- Pair with garlic bread and a simple salad for a full dinner spread.
Why You’ll Love This Recipe:
This pepperoni mozzarella lasagna is basically pizza and pasta combined into one dish. It’s easy to make with pantry staples, budget-friendly, and guaranteed to bring smiles to the dinner table.
Serving Size: About 6–8 servings
Prep Time: 20 minutes
Cook Time: 40 minutes
Total Time: 1 hour
Final Bite
Whether it’s a weeknight dinner or a weekend family gathering, this Easy Pepperoni Mozzarella Lasagna is bound to be a hit. It’s hearty, cheesy, and simple to whip up with just a few ingredients—making it the perfect recipe to keep in your rotation.
-
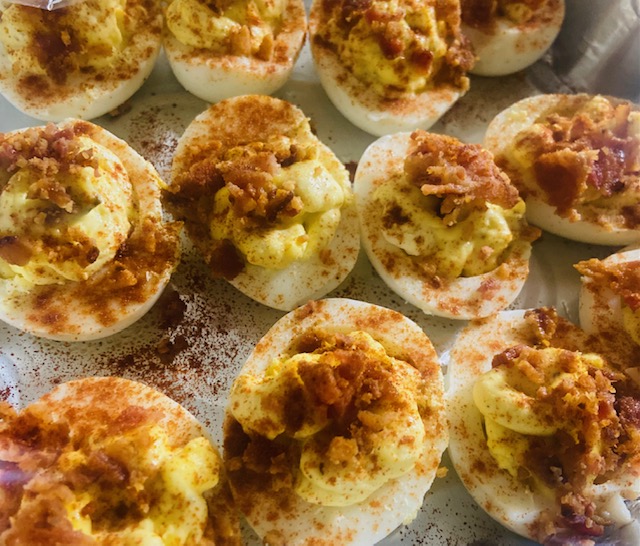
Easy Deviled Eggs with Bacon

Deviled eggs are a classic appetizer that’s always a hit at any gathering, and with a few simple additions, you can elevate them to something extraordinary. By adding crispy bacon and sweet relish, these deviled eggs offer a perfect blend of creamy, savory, and slightly tangy flavors. This recipe uses regular mustard instead of Dijon for a more familiar flavor, making it even more comforting and approachable.
Whether you’re preparing them for a holiday, a family gathering, or just a snack, these deviled eggs with bacon and sweet relish will be sure to impress!
Ingredients:
- 6 large eggs
- 4 slices of bacon
- 3 tablespoons mayonnaise
- 1 tablespoon regular mustard
- 1 tablespoon sweet relish
- Salt and pepper to taste
- 1/4 teaspoon smoked paprika (optional, for garnish)
- Fresh chives (optional, for garnish)
Instructions:
- Boil the Eggs: Begin by boiling the eggs. Place them in a saucepan and cover with water. Bring the water to a boil, then reduce the heat and simmer for 10-12 minutes. Once the eggs are cooked, transfer them to an ice water bath for 5-10 minutes to cool down and make peeling easier.
- Cook the Bacon: While the eggs are cooling, cook the bacon until it’s crispy. You can fry it in a skillet over medium heat or bake it in the oven at 400°F (200°C) for 15-20 minutes. Once crispy, place the bacon on paper towels to drain and crumble it into small pieces. Set aside for later.
- Prepare the Eggs: Peel the cooled eggs and slice them in half lengthwise. Gently remove the yolks and place them in a mixing bowl. Set the egg whites aside on a serving platter.
- Make the Filling: Mash the egg yolks with a fork until smooth. Add the mayonnaise, regular mustard, and sweet relish. Mix well until the filling is creamy and smooth. Season with salt and pepper to taste.
- Add the Bacon: Stir in most of the crumbled bacon into the egg yolk mixture, saving some for garnish. This will add a savory, crunchy bite to the filling.
- Fill the Eggs: Spoon or pipe the bacon-infused yolk mixture into the hollowed-out egg whites. Be generous with the filling to create a nice heaping mound.
- Garnish and Serve: Top each deviled egg with the remaining crumbled bacon. You can also garnish with a light sprinkle of smoked paprika or finely chopped chives for extra color and flavor.
- Enjoy! Serve these deviled eggs immediately for the best texture, or chill them in the fridge for a few hours before serving. The combination of creamy, tangy, and crispy flavors is sure to be a crowd favorite.
Conclusion:
These easy deviled eggs with bacon and sweet relish are the perfect twist on a classic recipe. The addition of crispy bacon and sweet relish creates a delightful contrast of flavors, while the regular mustard gives the filling a familiar, comforting taste. Whether you’re preparing them for a party, picnic, or casual snack, these deviled eggs will be a huge hit. Enjoy them as a savory treat that’s guaranteed to disappear quickly!
-
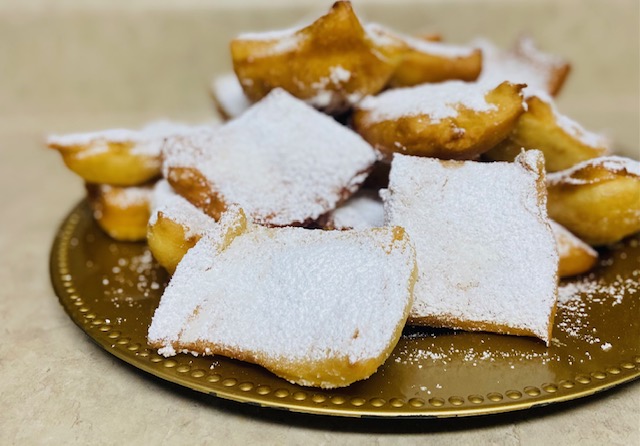
Easy Homemade Beignets Recipe– A Sweet Taste of New Orleans

If you’ve ever been to New Orleans, chances are you’ve tasted the famous beignets from the French Quarter. These fluffy, pillowy pastries, coated in powdered sugar, are a New Orleans classic. The good news is that you don’t have to travel to enjoy these sweet treats—you can make them right in your own kitchen!
This homemade beignet recipe is easy to follow and yields soft, light, and delicious pastries perfect for breakfast, dessert, or any time you want a sweet indulgence. Let’s dive into how to make these mouthwatering French doughnuts from scratch.
Ingredients:
- 1 cup warm water (about 110°F)
- 1 packet active dry yeast (or 2 ¼ teaspoons)
- 1/4 cup granulated sugar
- 1/2 cup evaporated milk
- 1 large egg
- 3 1/2 cups all-purpose flour (plus extra for dusting)
- 1/4 teaspoon salt
- 1/4 teaspoon vanilla extract
- 1/4 cup unsalted butter (melted)
- Vegetable oil (for frying)
- Powdered sugar (for dusting)
Instructions:
- Activate the Yeast: In a large bowl, combine the warm water, yeast, and granulated sugar. Stir to dissolve and let it sit for 5-10 minutes, until the mixture becomes frothy. This means the yeast is active and ready to go.
- Make the Dough: Add the evaporated milk, egg, melted butter, vanilla extract, salt, and about 2 cups of flour into the yeast mixture. Stir until combined. Gradually add the remaining flour, 1/4 cup at a time, until a dough forms. You may need a little extra flour to bring it all together, but try to keep the dough soft and sticky.
- Knead the Dough: Lightly flour a clean surface and turn the dough out. Knead it for about 5 minutes until it becomes smooth and elastic. If the dough is too sticky, dust it with a bit more flour as you knead, but avoid adding too much.
- Let the Dough Rise: Lightly oil a bowl and place the dough inside, turning it to coat in oil. Cover the bowl with a clean towel or plastic wrap and let the dough rise in a warm place for about 1-2 hours, or until it has doubled in size.
- Roll Out the Dough: Once the dough has risen, punch it down to release any air bubbles. Turn the dough out onto a floured surface and roll it out to about 1/4 inch thick.
- Cut the Beignets: Using a knife or pizza cutter, cut the dough into squares (about 2 to 3 inches in size). These will form the classic shape of beignets.
- Fry the Beignets: Heat about 2 inches of vegetable oil in a deep fryer or large pot to 350°F (175°C). Carefully drop a few squares of dough at a time into the hot oil, making sure not to overcrowd the pot. Fry for 2-3 minutes on each side, or until golden brown and puffed up. Use a slotted spoon to remove the beignets and place them on a paper towel-lined plate to drain any excess oil.
- Dust with Powdered Sugar: While the beignets are still hot, dust them generously with powdered sugar. You can even serve them in a paper bag, like they do in New Orleans, to get that authentic feel!
- Serve and Enjoy: Serve your homemade beignets warm, accompanied by a cup of coffee or café au lait. Enjoy the soft, sweet, and decadent treat with family and friends!
Conclusion:
There’s something magical about biting into a warm, sugary beignet. This recipe brings a taste of New Orleans right to your home with its soft, airy texture and delicious sweetness. Whether you’re celebrating Mardi Gras or just craving something special, these homemade beignets are sure to impress. Serve them at your next gathering, or enjoy them as a sweet breakfast treat—either way, you won’t be able to stop at just one!
Pro Tip: Beignets are best enjoyed fresh, but they also freeze well. You can fry them ahead of time, let them cool, and freeze them for a quick reheat and powdered sugar dusting later.
-

Easy Copycat Little Caesars Crazy Puffs Recipe (After school snack)

If you love Little Caesars Crazy Puffs, you’re going to love this homemade version! These cheesy, fluffy bites are incredibly easy to make with just a few simple ingredients. By using crescent rolls and a muffin tin, you can quickly create a delicious appetizer or snack that mimics the famous Crazy Puffs from Little Caesars, all in the comfort of your own kitchen.
Perfect for parties, game nights, or a tasty side dish to go with pizza, these Crazy Puffs are sure to be a hit. So let’s dive in and make this copycat recipe that’s as fun to eat as it is to make!
Ingredients:
- 1 can Crescent rolls (8 rolls)
- 1 cup Mozzarella cheese (shredded)
- 1 tablespoon Parmesan cheese (grated)
- 1 teaspoon Garlic powder
- 1 teaspoon Italian seasoning
- 1 tablespoon Butter (melted)
- 1/2 teaspoon Red pepper flakes (optional)
- Marinara sauce (for dipping)
Instructions:
- Preheat the Oven: Preheat your oven to 375°F (190°C). Lightly grease a muffin tin with cooking spray or a little butter to prevent the Crazy Puffs from sticking.
- Prepare the Crescent Rolls: Open the can of crescent rolls and unroll the dough. Separate the dough into individual triangles. If you have a small muffin tin, you may want to cut each triangle in half to make the puffs bite-sized.
- Fill the Muffin Tin: Take one piece of crescent roll dough and gently press it into each muffin cup to form a base. Press the dough around the sides of the cup, leaving a small indentation in the middle for the filling.
- Add the Cheese: Sprinkle a generous amount of shredded mozzarella cheese into the center of each dough cup. Then, top with a little grated Parmesan cheese for extra flavor.
- Season the Puffs: In a small bowl, mix together the garlic powder, Italian seasoning, and red pepper flakes (if using). Sprinkle this seasoning mix evenly over the cheese in each muffin cup.
- Bake the Crazy Puffs: Brush the tops of the filled crescent rolls with melted butter to give them that golden-brown, crispy finish. Place the muffin tin in the oven and bake for about 12-15 minutes, or until the dough is golden and the cheese is bubbling and melted.
- Serve: Once the Crazy Puffs are done baking, remove them from the muffin tin and let them cool for a few minutes. Serve with marinara sauce on the side for dipping.
Conclusion:
These Copycat Little Caesars Crazy Puffs are the perfect homemade snack that’s both easy to make and irresistibly delicious. With crescent rolls as the base and gooey cheese in every bite, this recipe gives you the cheesy, flavorful experience you love without the need for takeout. Try them for your next movie night, party, or pizza night, and watch how quickly they disappear!
Enjoy your Crazy Puffs and feel free to get creative by adding extra toppings like pepperoni, sausage, or even a little ranch dressing on top!
4o mini
O
-

Easy Homemade Three-Bean Chili Recipe

If you’re craving a hearty, flavorful chili that’s easy to make and perfect for a cozy meal, this Three-Bean Chili with McCormick Chili Seasoning is exactly what you need! Packed with protein, rich spices, and a blend of beans, this recipe comes together quickly using simple ingredients. Whether you’re cooking for a busy weeknight dinner or a crowd-pleasing dish for a gathering, this chili will be a hit every time.
Ingredients:
- 1 can Chili beans
- 1 can Red kidney beans
- 1 can Black beans
- 2 cups water
- 1 tablespoon Better Than Bouillon (vegetable or chicken)
- 1 tablespoon Tony’s Creole seasoning (or your favorite seasoning blend)
- 1 tablespoon McCormick Chili Seasoning
- 1 teaspoon onion powder
- 2 cloves garlic (minced)
- 1 can Diced tomatoes with chiles
- 1 small onion (diced)
Instructions:
- Prep the Ingredients: Drain and rinse the chili beans, red kidney beans, and black beans. Set them aside. Dice the small onion and mince the garlic.
- Cook the Aromatics: In a large pot or Dutch oven, heat a little oil over medium heat. Add the diced onion and cook until softened, about 3-4 minutes. Then, add the minced garlic and cook for another minute until fragrant.
- Combine the Beans: Once the onion and garlic are cooked, add the chili beans, red kidney beans, and black beans to the pot. Stir to combine everything.
- Add the Seasoning and Broth: Add the Better Than Bouillon, Tony’s Creole seasoning, McCormick Chili Seasoning, onion powder, and a pinch of salt and pepper. Stir everything together. Pour in the 2 cups of water and bring to a simmer.
- Simmer the Chili: Once the chili starts to simmer, add the can of diced tomatoes with chiles (don’t drain it). Stir everything together, reduce the heat, and let it simmer for 20-30 minutes, allowing the flavors to meld.
- Adjust the Seasoning: Taste the chili and adjust the seasoning as needed, adding more chili seasoning, Creole seasoning, onion powder, or salt if desired.
- Serve and Enjoy: Once the chili is thickened and the flavors are well-combined, it’s ready to serve! Enjoy it with a topping of shredded cheese, sour cream, or sliced jalapeños for extra flavor.
Conclusion:
This easy Three-Bean Chili, enhanced with McCormick Chili Seasoning, is a flavorful, comforting dish that’s perfect for any occasion. With minimal prep and pantry staples, you’ll have a delicious, filling meal ready to enjoy in no time. Make it for your next dinner, and watch how quickly it becomes a favorite!
-
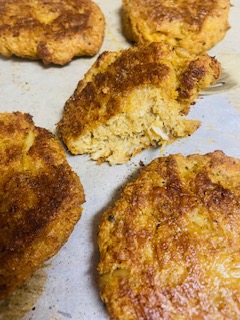
Easy Homemade Crab Cake Recipe

Crab cakes are a timeless seafood classic that brings a taste of the coast to your table. This easy recipe uses simple ingredients to create crispy, flavorful crab cakes that are perfect for dinner, appetizers, or even as a sandwich filling. Let’s dive into the recipe!
Ingredients:
- 1 lb lump crab meat
- 1/4 cup mayonnaise
- 1 tablespoon Dijon mustard
- 1 teaspoon Tony’s Creole seasoning
- 1 teaspoon Old Bay seasoning
- 1/2 cup breadcrumbs
- 1 egg, lightly beaten
- 1/2 teaspoon onion powder
Instructions:
- Prepare the Mixture: In a large mixing bowl, combine the mayonnaise, Dijon mustard, Tony’s Creole seasoning, Old Bay seasoning, and onion powder. Mix until well combined.
- Add Crab Meat and Breadcrumbs: Gently fold in the lump crab meat and breadcrumbs. Be careful not to break up the crab meat too much; you want the cakes to have a chunky texture.
- Incorporate the Egg: Add the beaten egg to the mixture and gently combine. The egg helps bind the ingredients together.
- Form the Crab Cakes: Divide the mixture into 6-8 portions and shape each portion into a patty about 1 inch thick.
- Chill the Crab Cakes: Place the formed crab cakes on a plate or tray and refrigerate for at least 30 minutes. This helps them hold their shape during cooking.
- Cook the Crab Cakes: Heat a skillet over medium heat and add a tablespoon of oil or butter. Once hot, cook the crab cakes for 3-4 minutes on each side, or until golden brown and heated through.
- Serve: Remove the crab cakes from the skillet and serve warm with your favorite dipping sauce, such as tartar sauce, remoulade, or a squeeze of lemon.
Tips for Success:
- Don’t Overmix: Be gentle when combining the ingredients to keep the crab meat’s texture intact.
- Refrigerate Before Cooking: Chilling the crab cakes helps them stay firm and prevents them from falling apart in the skillet.
- Adjust Seasonings: Taste the mixture before adding the egg and adjust the spices to your preference.
Serving Suggestions:
- Pair with a fresh green salad for a light meal.
- Use as a filling for sandwiches or sliders.
- Serve as an appetizer with dipping sauces for a party.
These easy homemade crab cakes are packed with flavor and sure to impress. Give them a try and bring a bit of coastal charm to your kitchen! Let us know how they turn out in the comments below.