Your cart is currently empty!
Author: Kingdom Bakery
-

Easy Homemade Beignets Recipe– A Sweet Taste of New Orleans

If you’ve ever been to New Orleans, chances are you’ve tasted the famous beignets from the French Quarter. These fluffy, pillowy pastries, coated in powdered sugar, are a New Orleans classic. The good news is that you don’t have to travel to enjoy these sweet treats—you can make them right in your own kitchen!
This homemade beignet recipe is easy to follow and yields soft, light, and delicious pastries perfect for breakfast, dessert, or any time you want a sweet indulgence. Let’s dive into how to make these mouthwatering French doughnuts from scratch.
Ingredients:
- 1 cup warm water (about 110°F)
- 1 packet active dry yeast (or 2 ¼ teaspoons)
- 1/4 cup granulated sugar
- 1/2 cup evaporated milk
- 1 large egg
- 3 1/2 cups all-purpose flour (plus extra for dusting)
- 1/4 teaspoon salt
- 1/4 teaspoon vanilla extract
- 1/4 cup unsalted butter (melted)
- Vegetable oil (for frying)
- Powdered sugar (for dusting)
Instructions:
- Activate the Yeast: In a large bowl, combine the warm water, yeast, and granulated sugar. Stir to dissolve and let it sit for 5-10 minutes, until the mixture becomes frothy. This means the yeast is active and ready to go.
- Make the Dough: Add the evaporated milk, egg, melted butter, vanilla extract, salt, and about 2 cups of flour into the yeast mixture. Stir until combined. Gradually add the remaining flour, 1/4 cup at a time, until a dough forms. You may need a little extra flour to bring it all together, but try to keep the dough soft and sticky.
- Knead the Dough: Lightly flour a clean surface and turn the dough out. Knead it for about 5 minutes until it becomes smooth and elastic. If the dough is too sticky, dust it with a bit more flour as you knead, but avoid adding too much.
- Let the Dough Rise: Lightly oil a bowl and place the dough inside, turning it to coat in oil. Cover the bowl with a clean towel or plastic wrap and let the dough rise in a warm place for about 1-2 hours, or until it has doubled in size.
- Roll Out the Dough: Once the dough has risen, punch it down to release any air bubbles. Turn the dough out onto a floured surface and roll it out to about 1/4 inch thick.
- Cut the Beignets: Using a knife or pizza cutter, cut the dough into squares (about 2 to 3 inches in size). These will form the classic shape of beignets.
- Fry the Beignets: Heat about 2 inches of vegetable oil in a deep fryer or large pot to 350°F (175°C). Carefully drop a few squares of dough at a time into the hot oil, making sure not to overcrowd the pot. Fry for 2-3 minutes on each side, or until golden brown and puffed up. Use a slotted spoon to remove the beignets and place them on a paper towel-lined plate to drain any excess oil.
- Dust with Powdered Sugar: While the beignets are still hot, dust them generously with powdered sugar. You can even serve them in a paper bag, like they do in New Orleans, to get that authentic feel!
- Serve and Enjoy: Serve your homemade beignets warm, accompanied by a cup of coffee or café au lait. Enjoy the soft, sweet, and decadent treat with family and friends!
Conclusion:
There’s something magical about biting into a warm, sugary beignet. This recipe brings a taste of New Orleans right to your home with its soft, airy texture and delicious sweetness. Whether you’re celebrating Mardi Gras or just craving something special, these homemade beignets are sure to impress. Serve them at your next gathering, or enjoy them as a sweet breakfast treat—either way, you won’t be able to stop at just one!
Pro Tip: Beignets are best enjoyed fresh, but they also freeze well. You can fry them ahead of time, let them cool, and freeze them for a quick reheat and powdered sugar dusting later.
-

Easy Copycat Little Caesars Crazy Puffs Recipe (After school snack)

If you love Little Caesars Crazy Puffs, you’re going to love this homemade version! These cheesy, fluffy bites are incredibly easy to make with just a few simple ingredients. By using crescent rolls and a muffin tin, you can quickly create a delicious appetizer or snack that mimics the famous Crazy Puffs from Little Caesars, all in the comfort of your own kitchen.
Perfect for parties, game nights, or a tasty side dish to go with pizza, these Crazy Puffs are sure to be a hit. So let’s dive in and make this copycat recipe that’s as fun to eat as it is to make!
Ingredients:
- 1 can Crescent rolls (8 rolls)
- 1 cup Mozzarella cheese (shredded)
- 1 tablespoon Parmesan cheese (grated)
- 1 teaspoon Garlic powder
- 1 teaspoon Italian seasoning
- 1 tablespoon Butter (melted)
- 1/2 teaspoon Red pepper flakes (optional)
- Marinara sauce (for dipping)
Instructions:
- Preheat the Oven: Preheat your oven to 375°F (190°C). Lightly grease a muffin tin with cooking spray or a little butter to prevent the Crazy Puffs from sticking.
- Prepare the Crescent Rolls: Open the can of crescent rolls and unroll the dough. Separate the dough into individual triangles. If you have a small muffin tin, you may want to cut each triangle in half to make the puffs bite-sized.
- Fill the Muffin Tin: Take one piece of crescent roll dough and gently press it into each muffin cup to form a base. Press the dough around the sides of the cup, leaving a small indentation in the middle for the filling.
- Add the Cheese: Sprinkle a generous amount of shredded mozzarella cheese into the center of each dough cup. Then, top with a little grated Parmesan cheese for extra flavor.
- Season the Puffs: In a small bowl, mix together the garlic powder, Italian seasoning, and red pepper flakes (if using). Sprinkle this seasoning mix evenly over the cheese in each muffin cup.
- Bake the Crazy Puffs: Brush the tops of the filled crescent rolls with melted butter to give them that golden-brown, crispy finish. Place the muffin tin in the oven and bake for about 12-15 minutes, or until the dough is golden and the cheese is bubbling and melted.
- Serve: Once the Crazy Puffs are done baking, remove them from the muffin tin and let them cool for a few minutes. Serve with marinara sauce on the side for dipping.
Conclusion:
These Copycat Little Caesars Crazy Puffs are the perfect homemade snack that’s both easy to make and irresistibly delicious. With crescent rolls as the base and gooey cheese in every bite, this recipe gives you the cheesy, flavorful experience you love without the need for takeout. Try them for your next movie night, party, or pizza night, and watch how quickly they disappear!
Enjoy your Crazy Puffs and feel free to get creative by adding extra toppings like pepperoni, sausage, or even a little ranch dressing on top!
4o mini
O
-

Easy Homemade Three-Bean Chili Recipe

If you’re craving a hearty, flavorful chili that’s easy to make and perfect for a cozy meal, this Three-Bean Chili with McCormick Chili Seasoning is exactly what you need! Packed with protein, rich spices, and a blend of beans, this recipe comes together quickly using simple ingredients. Whether you’re cooking for a busy weeknight dinner or a crowd-pleasing dish for a gathering, this chili will be a hit every time.
Ingredients:
- 1 can Chili beans
- 1 can Red kidney beans
- 1 can Black beans
- 2 cups water
- 1 tablespoon Better Than Bouillon (vegetable or chicken)
- 1 tablespoon Tony’s Creole seasoning (or your favorite seasoning blend)
- 1 tablespoon McCormick Chili Seasoning
- 1 teaspoon onion powder
- 2 cloves garlic (minced)
- 1 can Diced tomatoes with chiles
- 1 small onion (diced)
Instructions:
- Prep the Ingredients: Drain and rinse the chili beans, red kidney beans, and black beans. Set them aside. Dice the small onion and mince the garlic.
- Cook the Aromatics: In a large pot or Dutch oven, heat a little oil over medium heat. Add the diced onion and cook until softened, about 3-4 minutes. Then, add the minced garlic and cook for another minute until fragrant.
- Combine the Beans: Once the onion and garlic are cooked, add the chili beans, red kidney beans, and black beans to the pot. Stir to combine everything.
- Add the Seasoning and Broth: Add the Better Than Bouillon, Tony’s Creole seasoning, McCormick Chili Seasoning, onion powder, and a pinch of salt and pepper. Stir everything together. Pour in the 2 cups of water and bring to a simmer.
- Simmer the Chili: Once the chili starts to simmer, add the can of diced tomatoes with chiles (don’t drain it). Stir everything together, reduce the heat, and let it simmer for 20-30 minutes, allowing the flavors to meld.
- Adjust the Seasoning: Taste the chili and adjust the seasoning as needed, adding more chili seasoning, Creole seasoning, onion powder, or salt if desired.
- Serve and Enjoy: Once the chili is thickened and the flavors are well-combined, it’s ready to serve! Enjoy it with a topping of shredded cheese, sour cream, or sliced jalapeños for extra flavor.
Conclusion:
This easy Three-Bean Chili, enhanced with McCormick Chili Seasoning, is a flavorful, comforting dish that’s perfect for any occasion. With minimal prep and pantry staples, you’ll have a delicious, filling meal ready to enjoy in no time. Make it for your next dinner, and watch how quickly it becomes a favorite!
-
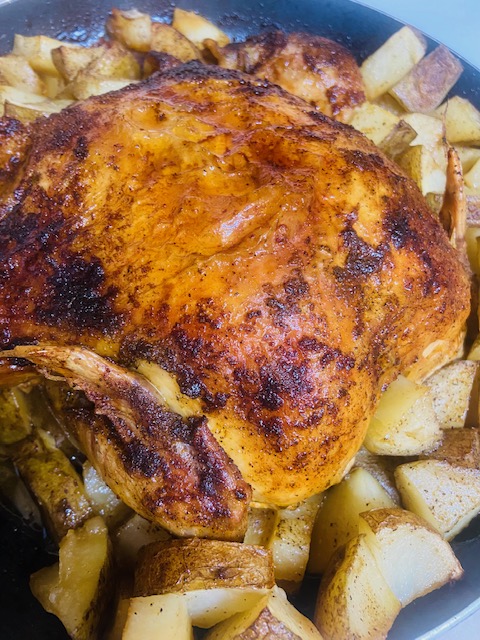
Easy Homemade Delicious Whole Chicken with Potatoes in the Oven

If you’re looking for a delicious, budget-friendly meal that’s full of flavor and easy to make, this roasted whole chicken with potatoes is the perfect dish for you. It’s comforting, aromatic, and simple to prepare, with ingredients that you likely already have in your pantry.
What makes this recipe so fantastic is the balance of juicy, tender chicken with crispy, seasoned potatoes. The chicken is seasoned with rich butter, a combination of spices, and stuffed with a whole onion for even more flavor. The potatoes surround the chicken, soaking up all the delicious juices while they roast in the oven, resulting in a satisfying one-pan meal.
Ingredients:
- 1 whole chicken (3-4 lbs)
- 4 tablespoons of butter (room temperature)
- 1 tablespoon Tony’s Creole seasoning (or your favorite seasoning blend)
- 1 teaspoon onion powder
- 1 teaspoon paprika
- Freshly cracked black pepper to taste
- 1 large onion (for stuffing)
- 4-5 medium potatoes (peeled and cut into chunks)
- Olive oil (for coating potatoes)
- Salt and pepper (for seasoning potatoes)
- Optional: Fresh herbs (rosemary or thyme for garnish)
Instructions:
- Preheat the Oven: Preheat your oven to 375°F (190°C). This will ensure the chicken gets crispy skin while staying tender inside.
- Prepare the Chicken: Remove the chicken from the packaging, pat it dry with paper towels, and place it in a roasting pan. Rub the entire chicken with the butter, making sure to coat all parts of the skin. This will help create a golden, crispy texture.
- Season the Chicken: Sprinkle the chicken with the Tony’s Creole seasoning, onion powder, paprika, and freshly cracked black pepper. Be generous with the seasoning and make sure to rub it all over the skin, under the wings, and inside the cavity.
- Stuff the Chicken: Take the whole onion and cut it in half. Place one half inside the cavity of the chicken for extra flavor. The onion will infuse the chicken with moisture and sweetness as it roasts.
- Roast the Chicken: Place the chicken in the preheated oven and roast it for 1 hour. The chicken will start to cook through and the skin will begin to crisp up.
- Prepare the Potatoes: While the chicken is roasting, peel and cut the potatoes into chunks. Toss them in a little olive oil, salt, and pepper to season.
- Add the Potatoes: After the chicken has been roasting for 1 hour, carefully remove the pan from the oven. Arrange the seasoned potatoes around the chicken in the roasting pan. Use a spoon or baster to drizzle some of the chicken’s juices over the potatoes. This will ensure they absorb all the delicious flavors from the chicken.
- Roast Again: Return the roasting pan to the oven and continue cooking for another 45 minutes to 1 hour, or until the chicken is fully cooked and the potatoes are tender and golden brown. You can check the chicken’s internal temperature with a meat thermometer; it should read 165°F (74°C) in the thickest part of the thigh.
- Baste: Throughout the cooking process, use a spoon or baster to spoon some of the chicken’s juices over the chicken and potatoes every 20 minutes. This will keep the chicken moist and help the potatoes absorb even more flavor.
- Serve: Once the chicken is golden brown and the potatoes are tender, remove everything from the oven. Let the chicken rest for 10-15 minutes before carving. Serve with the roasted potatoes on the side, and garnish with fresh herbs if desired.
Conclusion:
This whole chicken with potatoes is a perfect example of how simple ingredients can create an incredible meal. The butter and seasoning on the chicken provide a rich flavor, while the potatoes roast to perfection in the chicken’s juices. The best part? It’s all cooked in one pan, making cleanup a breeze. Enjoy your inexpensive, yet absolutely delicious meal!
-
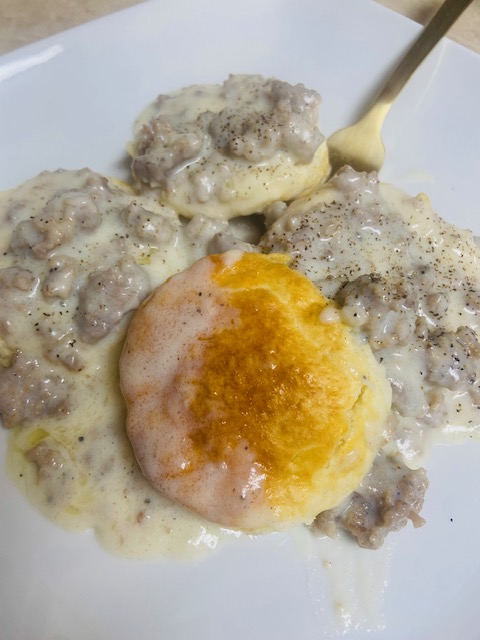
Easy Homemade Sausage Gravy Recipe

Sausage gravy is a comforting Southern classic that’s perfect for breakfast or brunch. Rich, creamy, and packed with savory flavor, this gravy pairs perfectly with flaky biscuits or even hash browns. Here’s an easy recipe to make delicious homemade sausage gravy using simple ingredients.
Ingredients:
- 1 1/2 lb homestyle breakfast sausage
- 1/4 cup all-purpose flour
- 3 cups whole milk (or more as needed)
- 1/2 teaspoon salt (adjust to taste)
- 1/2 teaspoon black pepper (freshly ground, if possible)
- Optional: a pinch of crushed red pepper flakes for a hint of heat
Instructions:
- Cook the Sausage: Heat a large skillet over medium heat. Add the sausage and cook, breaking it up with a spatula, until browned and fully cooked. This should take about 6-8 minutes. Do not drain the grease; it adds flavor to the gravy.
- Add the Flour: Sprinkle the flour evenly over the cooked sausage. Stir well to coat the sausage and absorb the grease. Cook for 1-2 minutes to remove the raw flour taste.
- Add the Milk: Gradually pour in the milk, stirring constantly to combine with the sausage and flour mixture. Continue to stir as the gravy starts to thicken. This will take about 5-7 minutes.
- Season the Gravy: Add salt, black pepper, and red pepper flakes (if using). Taste and adjust the seasoning as needed.
- Adjust Consistency: If the gravy is too thick, add a splash of milk and stir until you reach your desired consistency. If it’s too thin, let it simmer for a few more minutes to thicken.
- Serve: Remove the gravy from the heat and serve warm over freshly baked biscuits. Garnish with a sprinkle of black pepper if desired.
Tips for the Best Sausage Gravy:
- Quality Sausage: Use a good-quality breakfast sausage for the best flavor. Homestyle or seasoned varieties work particularly well.
- Don’t Skip the Grease: The rendered fat from the sausage is what makes the gravy rich and flavorful.
- Customize the Heat: Add cayenne pepper or hot sauce if you like a spicier gravy.
Serving Suggestions:
- Classic Pairing: Check out our easy 2-ingredient biscuits here: Serve over warm, flaky biscuits for a traditional breakfast.
- Creative Options: Use the gravy as a topping for hash browns, mashed potatoes, or even scrambled eggs.
- Make it a Meal: Pair with eggs, fresh fruit, and coffee for a hearty breakfast spread.
Homemade sausage gravy is a versatile dish that’s sure to become a family favorite. With just a handful of ingredients and a little time, you can whip up this comforting classic any day of the week. Let us know how you enjoyed this recipe in the comments below!
-
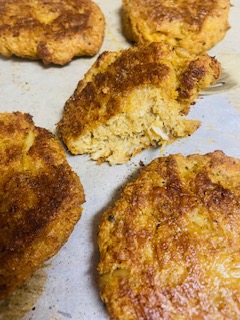
Easy Homemade Crab Cake Recipe

Crab cakes are a timeless seafood classic that brings a taste of the coast to your table. This easy recipe uses simple ingredients to create crispy, flavorful crab cakes that are perfect for dinner, appetizers, or even as a sandwich filling. Let’s dive into the recipe!
Ingredients:
- 1 lb lump crab meat
- 1/4 cup mayonnaise
- 1 tablespoon Dijon mustard
- 1 teaspoon Tony’s Creole seasoning
- 1 teaspoon Old Bay seasoning
- 1/2 cup breadcrumbs
- 1 egg, lightly beaten
- 1/2 teaspoon onion powder
Instructions:
- Prepare the Mixture: In a large mixing bowl, combine the mayonnaise, Dijon mustard, Tony’s Creole seasoning, Old Bay seasoning, and onion powder. Mix until well combined.
- Add Crab Meat and Breadcrumbs: Gently fold in the lump crab meat and breadcrumbs. Be careful not to break up the crab meat too much; you want the cakes to have a chunky texture.
- Incorporate the Egg: Add the beaten egg to the mixture and gently combine. The egg helps bind the ingredients together.
- Form the Crab Cakes: Divide the mixture into 6-8 portions and shape each portion into a patty about 1 inch thick.
- Chill the Crab Cakes: Place the formed crab cakes on a plate or tray and refrigerate for at least 30 minutes. This helps them hold their shape during cooking.
- Cook the Crab Cakes: Heat a skillet over medium heat and add a tablespoon of oil or butter. Once hot, cook the crab cakes for 3-4 minutes on each side, or until golden brown and heated through.
- Serve: Remove the crab cakes from the skillet and serve warm with your favorite dipping sauce, such as tartar sauce, remoulade, or a squeeze of lemon.
Tips for Success:
- Don’t Overmix: Be gentle when combining the ingredients to keep the crab meat’s texture intact.
- Refrigerate Before Cooking: Chilling the crab cakes helps them stay firm and prevents them from falling apart in the skillet.
- Adjust Seasonings: Taste the mixture before adding the egg and adjust the spices to your preference.
Serving Suggestions:
- Pair with a fresh green salad for a light meal.
- Use as a filling for sandwiches or sliders.
- Serve as an appetizer with dipping sauces for a party.
These easy homemade crab cakes are packed with flavor and sure to impress. Give them a try and bring a bit of coastal charm to your kitchen! Let us know how they turn out in the comments below.
-
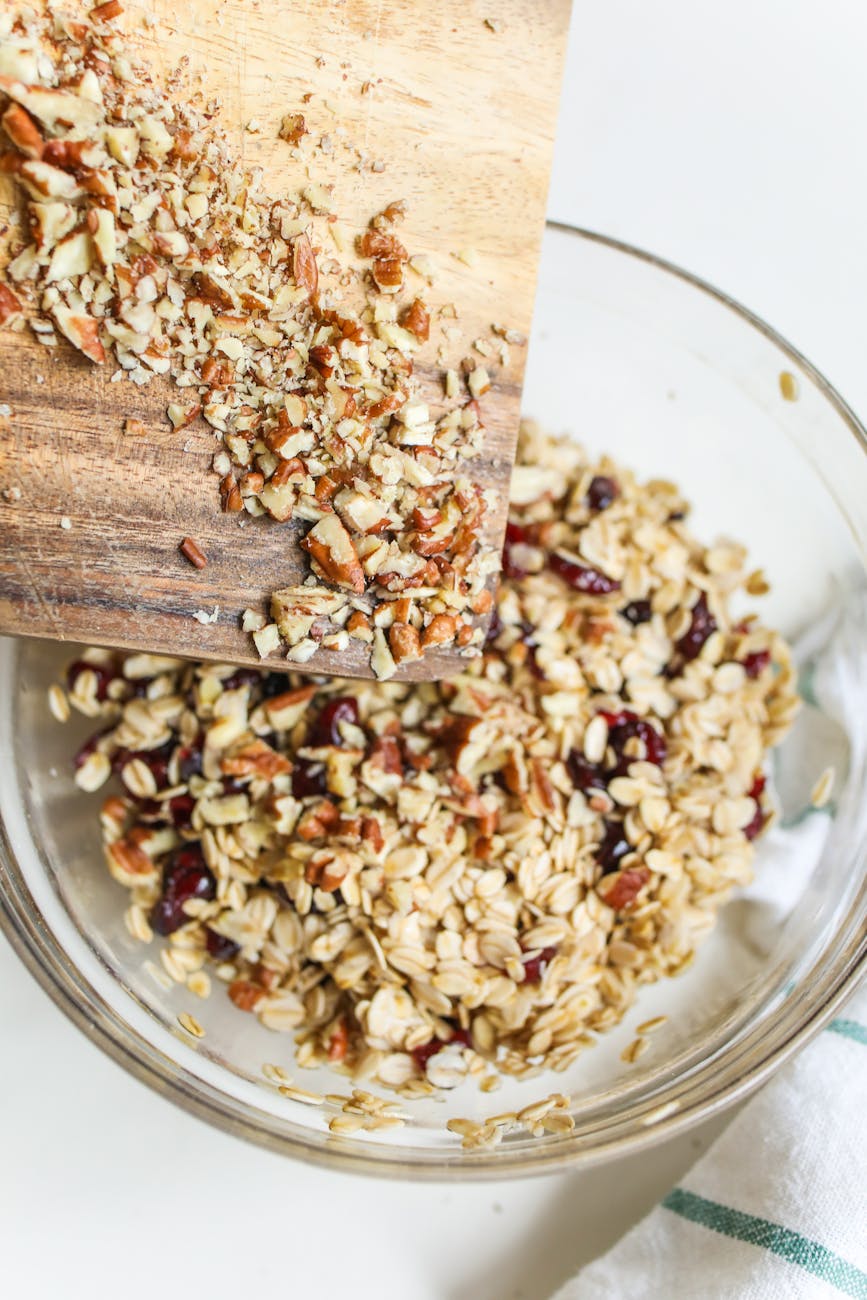
Homemade Granola Recipe: Easy, Delicious, and Customizable

Photo by Polina Tankilevitch on Pexels.com Granola is the perfect blend of crunchy, sweet, and wholesome goodness. Whether you’re looking for a quick breakfast, a healthy snack, or a topping for your favorite yogurt, homemade granola is an easy and cost-effective option. Plus, you can customize it to suit your taste preferences and dietary needs.
Here’s a simple recipe to make your own homemade granola:
Ingredients:
- 3 cups of rolled oats
- 1 cup of nuts (almonds, pecans, or walnuts work great)
- 1/2 cup of seeds (sunflower, pumpkin, or chia seeds)
- 1/2 cup of dried fruits (cranberries, raisins, or apricots)
- 1/3 cup of honey or maple syrup
- 1/3 cup of coconut oil or vegetable oil
- 1 teaspoon of vanilla extract
- 1/2 teaspoon of ground cinnamon
- 1/4 teaspoon of salt
Instructions:
- Preheat the Oven: Set your oven to 325°F (165°C) and line a baking sheet with parchment paper.
- Mix the Dry Ingredients: In a large mixing bowl, combine the oats, nuts, seeds, cinnamon, and salt. Stir until well mixed.
- Prepare the Wet Ingredients: In a small saucepan, warm the honey (or maple syrup), coconut oil, and vanilla extract over low heat until the mixture is smooth and combined. Remove from heat.
- Combine Wet and Dry Ingredients: Pour the warm honey mixture over the dry ingredients. Mix well to ensure everything is evenly coated.
- Spread on Baking Sheet: Evenly spread the granola mixture onto the prepared baking sheet. Press it down lightly for chunkier granola.
- Bake: Bake for 20-25 minutes, stirring halfway through for even toasting. Keep an eye on it to prevent burning.
- Cool and Add Dried Fruit: Remove the granola from the oven and let it cool completely. Once cooled, stir in the dried fruit.
- Store: Transfer your homemade granola to an airtight container. It will stay fresh for up to two weeks.
Tips for Customization:
- Sweetness: Adjust the sweetness to your liking by adding more or less honey/maple syrup.
- Add-Ins: Sprinkle in extras like shredded coconut, chocolate chips, or spices (like nutmeg) after baking.
- Texture: For extra clusters, don’t stir the granola while it’s cooling.
How to Enjoy Your Granola:
- As a topping for yogurt or smoothie bowls.
- Mixed with milk for a crunchy breakfast cereal.
- On its own as a grab-and-go snack.
Making homemade granola is incredibly rewarding. Not only is it healthier than many store-bought options, but it’s also a fun way to experiment with flavors and ingredients. Give it a try and share your favorite combinations in the comments below!
-
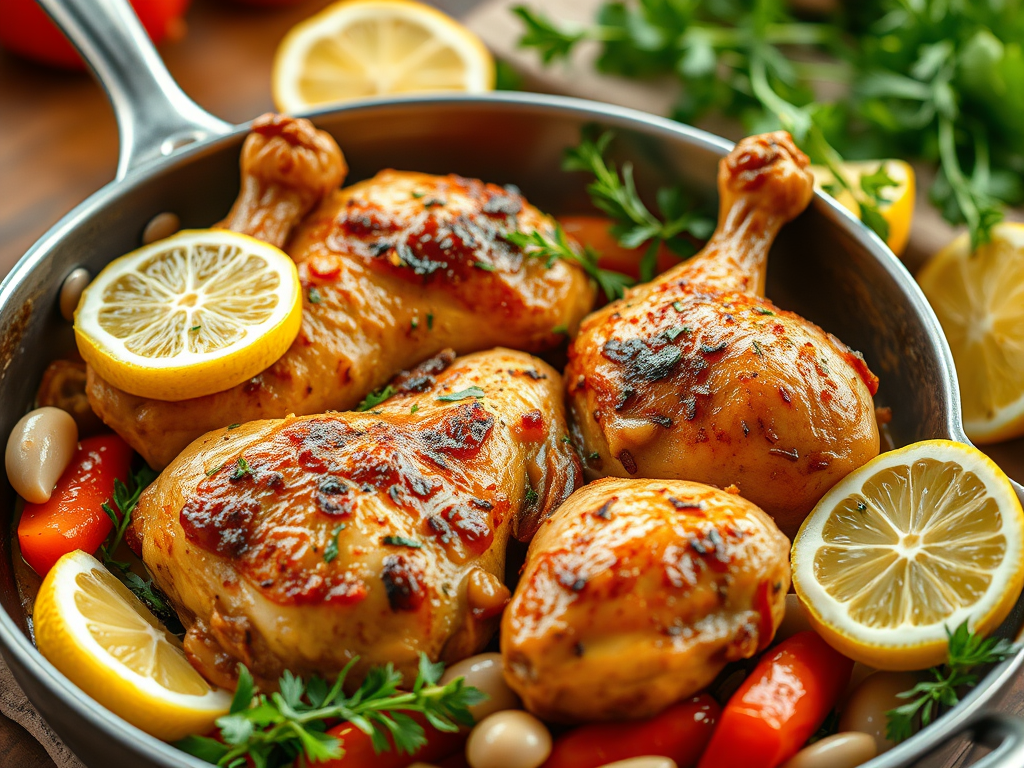
5 Easy Weeknight Recipes to Simplify Your Dinner Routine

Affiliate Disclosure
This site contains affiliate links. If you purchase items through these links, I may earn a small commission at no extra cost to you. Your support helps keep this site running and is greatly appreciated.
Busy weeknights can make preparing dinner feel like a daunting task. To help ease the burden, we’ve compiled five quick, delicious, and family-friendly recipes that will have dinner on the table in no time. These dishes use simple ingredients and require minimal prep work, making them perfect for hectic schedules.
1. One-Pan Lemon Garlic Chicken and Vegetables
Ingredients:
- 4 boneless, skinless chicken breasts
- 2 cups baby carrots
- 1 cup green beans, trimmed
- 4 medium potatoes, chopped
- 2 tablespoons olive oil
- 3 garlic cloves, minced
- Juice of 1 lemon
- 1 teaspoon dried oregano
- Salt and pepper to taste
Instructions:
- Preheat oven to 400°F (200°C).
- Arrange chicken and vegetables on a baking sheet.
- Drizzle olive oil, lemon juice, garlic, oregano, salt, and pepper over everything. Toss to coat.
- Bake for 25-30 minutes or until chicken is cooked through and vegetables are tender.
2. 15-Minute Shrimp Stir-Fry
Ingredients:
- 1 pound shrimp, peeled and deveined
- 2 cups mixed vegetables (e.g., broccoli, bell peppers, snap peas)
- 2 tablespoons soy sauce
- 1 tablespoon sesame oil
- 1 teaspoon minced ginger
- 1 garlic clove, minced
- Cooked rice or noodles, for serving
Instructions:
- Heat sesame oil in a large skillet or wok over medium heat.
- Add garlic and ginger, cooking until fragrant (about 30 seconds).
- Add shrimp and cook for 2-3 minutes per side.
- Toss in vegetables and soy sauce, stir-frying for another 5 minutes.
- Serve over cooked rice or noodles.
3. Creamy Tomato Pasta
Ingredients:
- 12 ounces penne pasta
- 1 tablespoon olive oil
- 1 onion, diced
- 2 garlic cloves, minced
- 1 can (15 ounces) crushed tomatoes
- ½ cup heavy cream
- ¼ cup grated Parmesan cheese
- Salt and pepper to taste
- Fresh basil, for garnish
Instructions:
- Cook pasta according to package instructions.
- In a large skillet, heat olive oil and sauté onion and garlic until softened.
- Stir in crushed tomatoes and simmer for 5 minutes.
- Add heavy cream and Parmesan cheese, stirring until creamy.
- Toss cooked pasta in the sauce and garnish with basil.
4. Sheet Pan Sausage and Peppers click for sheet pans
Ingredients:
- 4 Italian sausages
- 3 bell peppers, sliced
- 1 large onion, sliced
- 2 tablespoons olive oil
- 1 teaspoon Italian seasoning
- Salt and pepper to taste
Instructions:
- Preheat oven to 425°F (220°C).
- Place sausages, bell peppers, and onions on a baking sheet.
- Drizzle with olive oil, Italian seasoning, salt, and pepper. Toss to coat.
- Bake for 20-25 minutes, flipping halfway through, until sausages are cooked through.
5. Quick Beef Tacos
Ingredients:
- 1 pound ground beef
- 1 packet taco seasoning
- 8 taco shells
- 1 cup shredded lettuce
- 1 cup shredded cheese
- ½ cup diced tomatoes
- Sour cream and salsa, for serving
Instructions:
- Cook ground beef in a skillet over medium heat until browned. Drain excess fat.
- Add taco seasoning and a splash of water. Cook until well combined.
- Assemble tacos by filling shells with beef, lettuce, cheese, and tomatoes.
- Serve with sour cream and salsa on the side.
Conclusion
With these five easy recipes, you can create delicious weeknight meals without the stress. They’re versatile, quick to prepare, and sure to please the whole family. Enjoy your time at the dinner table instead of the kitchen!
-
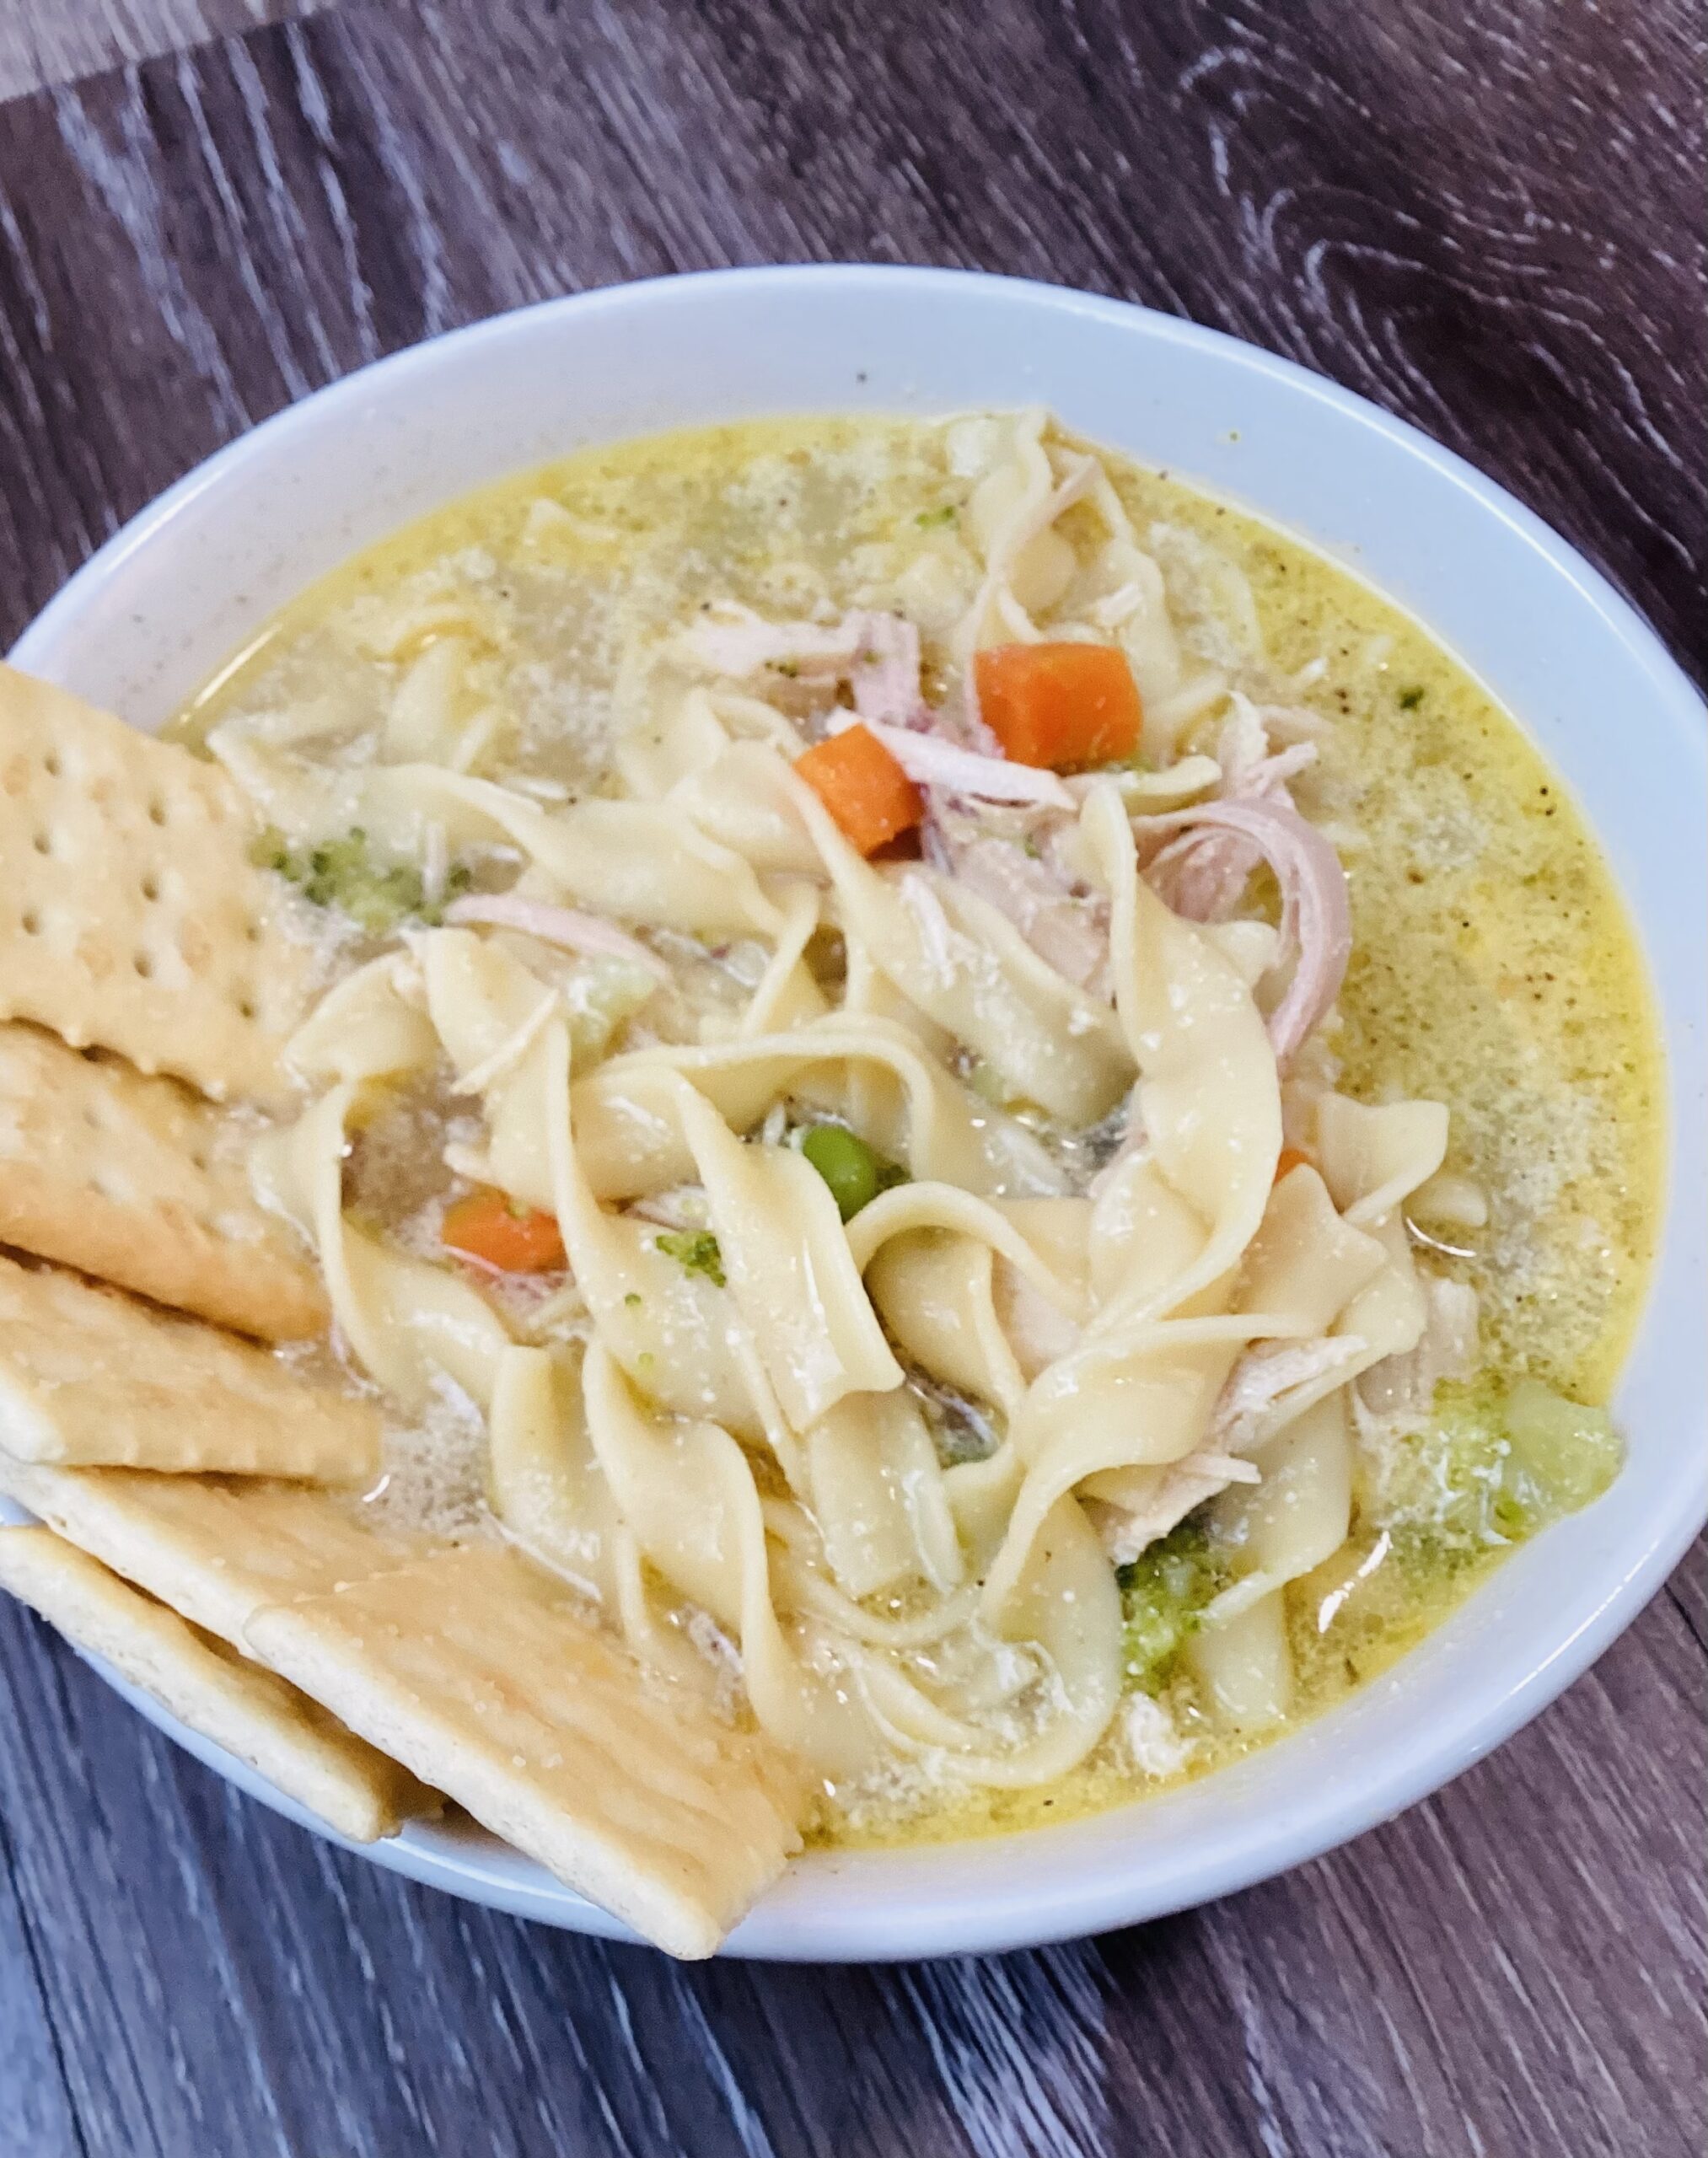
Cozy and Comforting Easy Chicken or Turkey Noodle Soup

Nothing warms the soul quite like a hearty bowl of noodle soup, especially during the chilly months or when you’re feeling under the weather. This Easy Chicken or Turkey Noodle Soup is not only comforting but also quick to prepare, thanks to a few pantry staples and frozen veggies. It’s the perfect way to use up leftover chicken or turkey, or you can make it vegetarian by skipping the meat and using vegetable broth instead. Let’s dive into this simple and delicious recipe!
Ingredients:
- 1/2 onion, diced
- 1 carton (32 oz) chicken or turkey broth
- 4 cups water
- 1 tbsp Better Than Bouillon chicken flavor
- 2 chicken bouillon cubes
- 1 tsp turmeric
- 1 tsp onion powder
- Black pepper, to taste
- 2 cups medium egg noodles
- 1/2 bag (about 1 cup) frozen peas and carrots
- 1/2 cup frozen broccoli
- 1/4 cup half and half
- Salt, to taste
- Optional: 1-2 cups cooked, shredded chicken or turkey (if desired)
Instructions:
- Prepare the Base:
- In a large pot, combine the diced onion, chicken or turkey broth, and water. Bring to a gentle boil over medium-high heat.
- Add Seasonings:
- Stir in the Better Than Bouillon, chicken bouillon cubes, turmeric, onion powder, and black pepper. Let the mixture simmer for about 5 minutes to allow the flavors to meld.
- Cook the Vegetables:
- Add the frozen peas, carrots, and broccoli to the pot. Simmer until the vegetables are tender.
- Cook the Noodles:
- Turn off the stovetop and stir in the egg noodles. Cover the pot and let the residual heat cook the noodles until tender (about 8-10 minutes). Stir occasionally to prevent sticking.
- Incorporate the Protein (Optional):
- If you’re using cooked chicken or turkey, stir it into the soup during the last 2-3 minutes of resting to warm through.
- Add Half and Half:
- Stir in the 1/4 cup of half and half during the final minutes for a creamy finish.
- Adjust Seasonings:
- Taste the soup and adjust salt and pepper as needed. You may also add more bouillon for a richer flavor if desired.
- Serve and Enjoy:
- Ladle the soup into bowls and serve warm. Pair it with a slice of crusty bread or crackers for a complete meal.
Tips and Variations:
- Make it Creamy: Add a splash of heavy cream or milk toward the end for a creamy version of this soup.
- Vegetarian Option: Use vegetable broth and skip the chicken or turkey.
- Add Herbs: Fresh parsley or thyme make great garnishes for added flavor.
- Storage: Store leftovers in an airtight container in the refrigerator for up to 3 days. Reheat gently on the stovetop or in the microwave.
This Easy Chicken or Turkey Noodle Soup is a guaranteed crowd-pleaser, perfect for busy weeknights or cozy weekends at home. Enjoy the warmth and comfort in every spoonful!
-
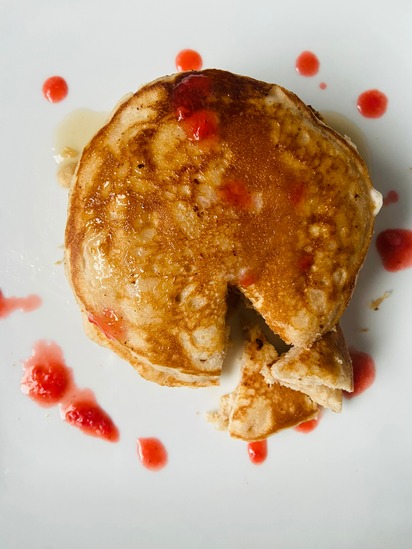
Easy Strawberry Pancakes Recipe: The Perfect Start to Your Day!

When it comes to breakfast, there’s something undeniably comforting about pancakes. Add strawberries to the mix, and you’ve got a sweet, tangy treat that’s perfect for a weekend morning. Using simple ingredients, this strawberry pancake recipe is both easy to follow and absolutely delicious. Whether you’re using fresh or frozen strawberries, the result is a fluffy, fruity pancake that’ll have everyone asking for seconds.
Ingredients:
- 1/2 cup self-rising flour
- 1 tablespoon avocado oil (or your preferred oil)
- 1 tablespoon melted butter
- 1/4 cup milk (use 2 tablespoons if using frozen strawberries; adjust for consistency)
- 1 egg
- 1/4 cup sugar
- 1 teaspoon vanilla extract
- 5 whole strawberries (fresh or frozen; thaw if frozen)
- Extra strawberries for garnish
Step-by-Step Instructions:
- Prepare the Strawberries
If using frozen strawberries, thaw them in the microwave until soft and juicy. Mash the strawberries with a fork or chop them into small pieces, reserving a few slices for garnish. If using fresh strawberries, dice them into small chunks. - Mix the Wet Ingredients
In a medium bowl, whisk together the egg, sugar, vanilla extract, avocado oil, and melted butter until smooth. Stir in the mashed or chopped strawberries. - Add the Dry Ingredients
Gradually mix the self-rising flour into the wet mixture, stirring until just combined. Be careful not to overmix to keep the batter light and fluffy. - Adjust the Consistency
Slowly add milk (or reduced milk if using frozen strawberries) until the batter reaches a pourable yet thick consistency. If the batter feels too thick, add a bit more milk, one teaspoon at a time. - Cook the Pancakes
Heat a non-stick skillet or griddle over medium heat. Lightly grease the surface with a small amount of butter or oil.Pour about 1/4 cup of batter onto the skillet for each pancake. Cook for 2-3 minutes, or until bubbles appear on the surface and the edges look set. Flip and cook for another 1-2 minutes until golden brown. - Serve and Enjoy
Stack the pancakes on a plate and garnish with the reserved strawberry slices. For an extra touch, drizzle with maple syrup, powdered sugar, or a dollop of whipped cream.
Tips for the Best Strawberry Pancakes:
- Use ripe strawberries: Whether fresh or frozen, make sure your strawberries are sweet and flavorful for the best results.
- Don’t overmix: Overmixing the batter can make the pancakes dense instead of fluffy.
- Adjust sweetness: If you prefer a less sweet pancake, reduce the sugar to 2 tablespoons.
- Add-ins: For an extra twist, toss in some mini chocolate chips or a sprinkle of cinnamon.
There you have it — a quick and easy recipe for strawberry pancakes that’s sure to brighten your morning. Pair these pancakes with your favorite coffee or tea, and enjoy the delightful combination of fluffy batter and juicy strawberries. Happy cooking!

